Soldering healthy joints
When soldering a project, you'll want to take good care of it. Soldering is a skill that rewards patience and attention to detail. On this page, we'll focus on what a joint is, and how to make a good one.
What is a joint?
Soldering is the process of joining two or more parts together through a mechanical bond. By applying heat to two metallic parts and feeding so-called "solder wire" into it, the wire will melt and adhere to the two metallic parts, forming a joint.
A joint ensures electrical contact between both parts, so that electricity can flow through. In keyboards, that is usually either signals so the keyboard's controller can read whether keys are pressed, or power so that various accessories such as LEDs or displays can do their job.
How is a joint formed?
You will use a soldering iron to apply heat. The tip of the soldering iron can get very hot, and by pushing the tip against a surface, the iron can transfer heat to that surface.
A joint is a bond between two surfaces. For a proper joint to form, you need to heat up both surfaces at the same time.
After a second or two, the surfaces will be hot, and you can push solder wire near your soldering iron's tip. The solder will melt, and because you've heated up the surfaces, they will pull the molten solder onto them because of surface tension. The entire process takes only a few seconds, after which you can pull away your soldering iron, leaving a joint.
Wondering at which temperature you should solder? Please read Dialling in your iron's temperature.
What makes for a good soldering joint?
A good soldering joint is strong and reliable. This strength comes from the surface area that the solder is applied to across both the pad and the component you want to solder.
In the photo below, there are several good as well as bad joints. Here are the characteristics of a good joint:
- A good joint usually spans across the entire pad on the PCB.
- In kits sold at splitkb.com, the exception to this are the switch pads on the Hand version of most of our kits. These pads are quite large, and don't need to be entirely covered - just forming a volcano-like shape is enough.
- A good joint makes contact with both the pad as well as the pin, lead or leg of the component.
- A good joint has just enough solder to form a volcano-like shape.
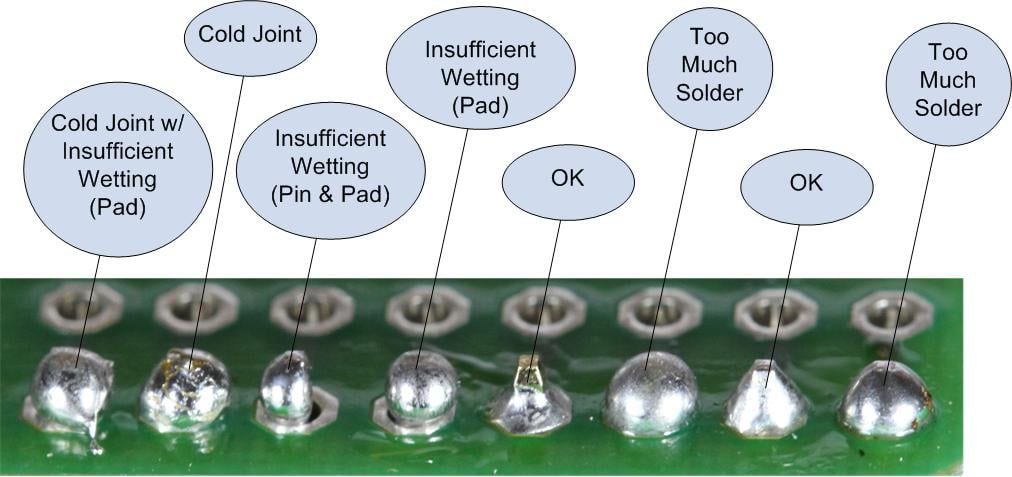
A few example joints. The good joints look like a little volcano.
Joints for SMD components are similar to those of THT components, in that they too should resemble a volcano-like shape. The build guide will include example photos for all components, below are a few examples on how a joint should look on an SMD component:
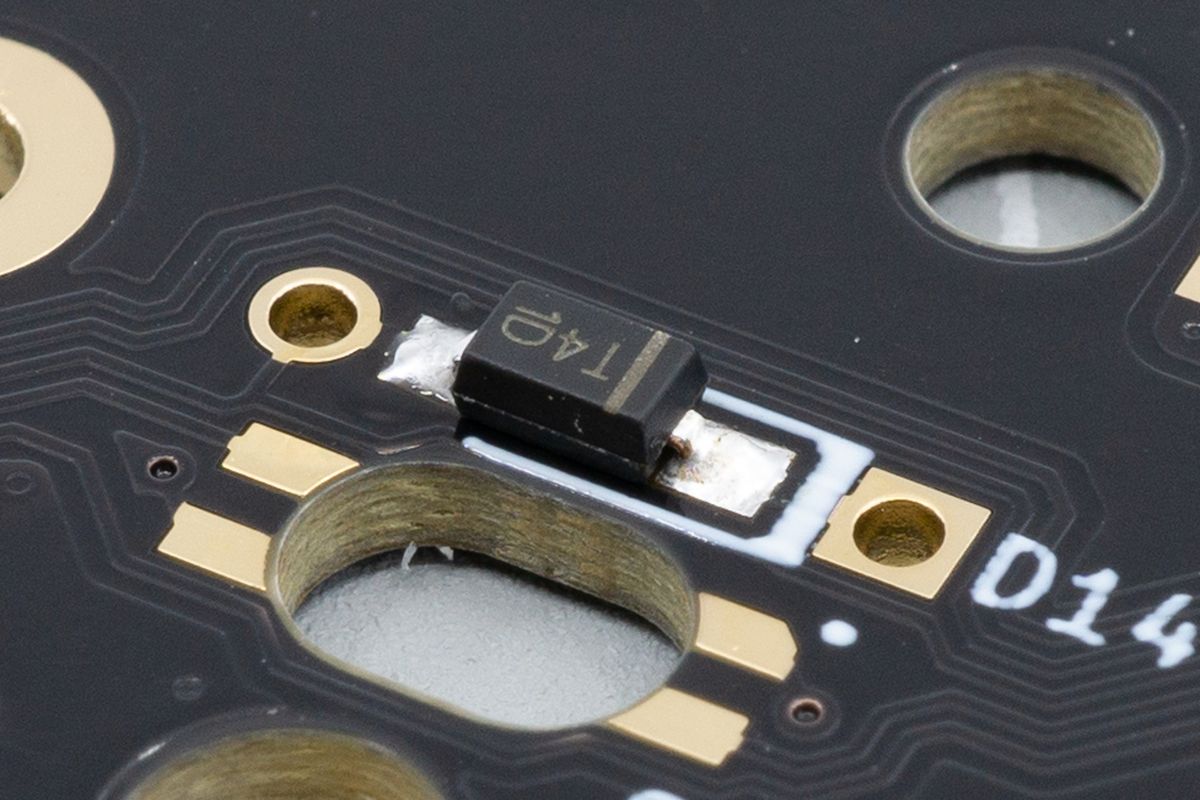
An SMD diode.
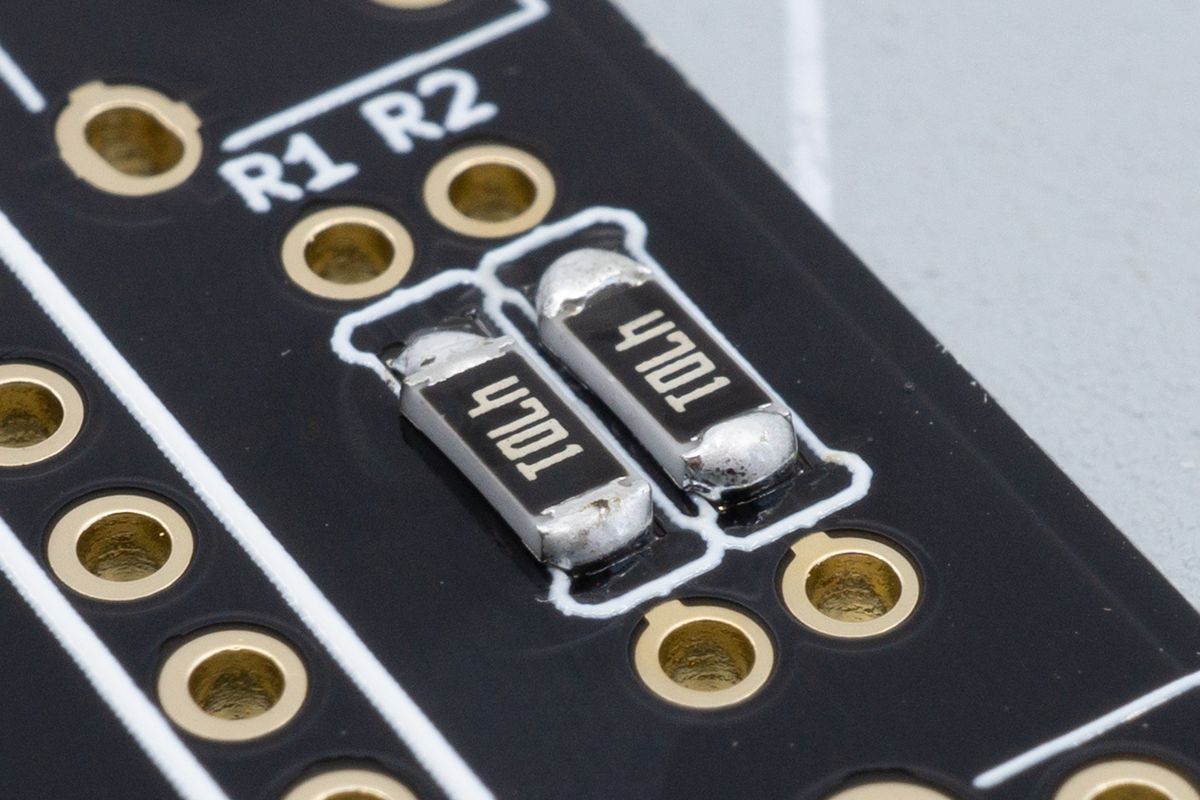
SMD resistors, not the most perfect joints but they'll work.
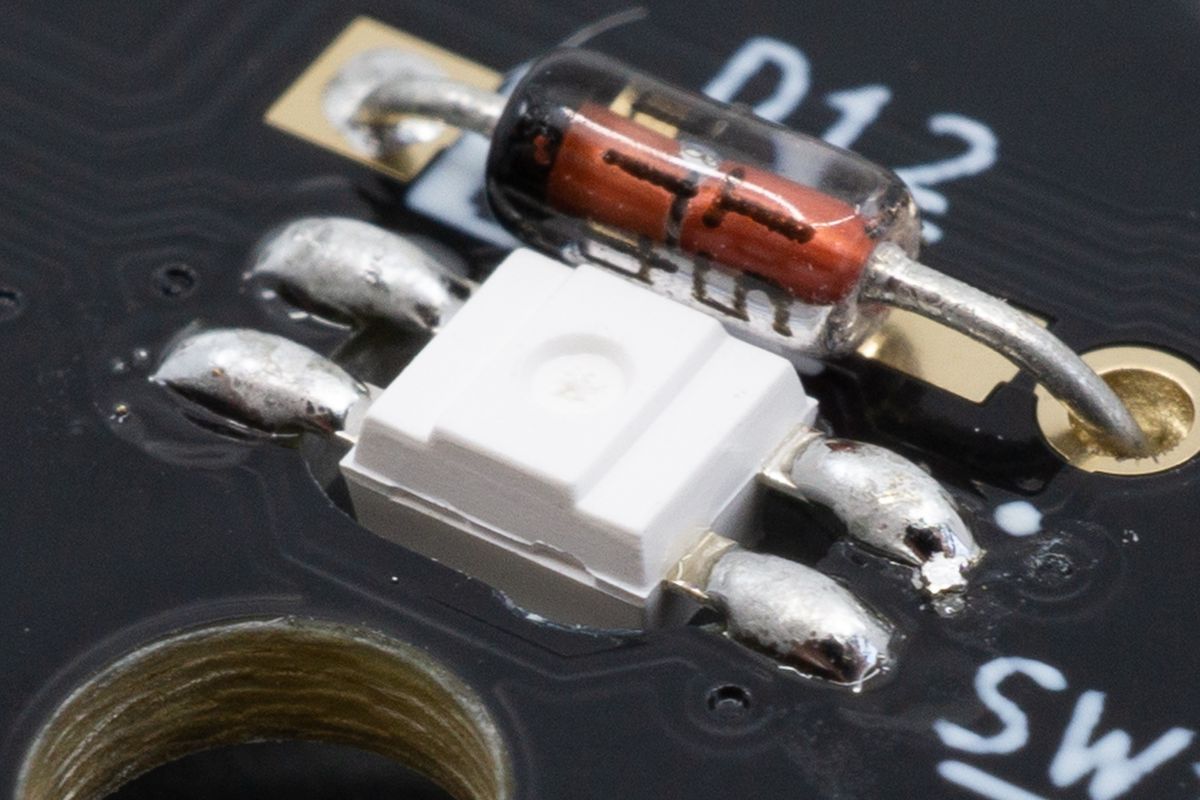
An SK6812MINI-E RGB LED.
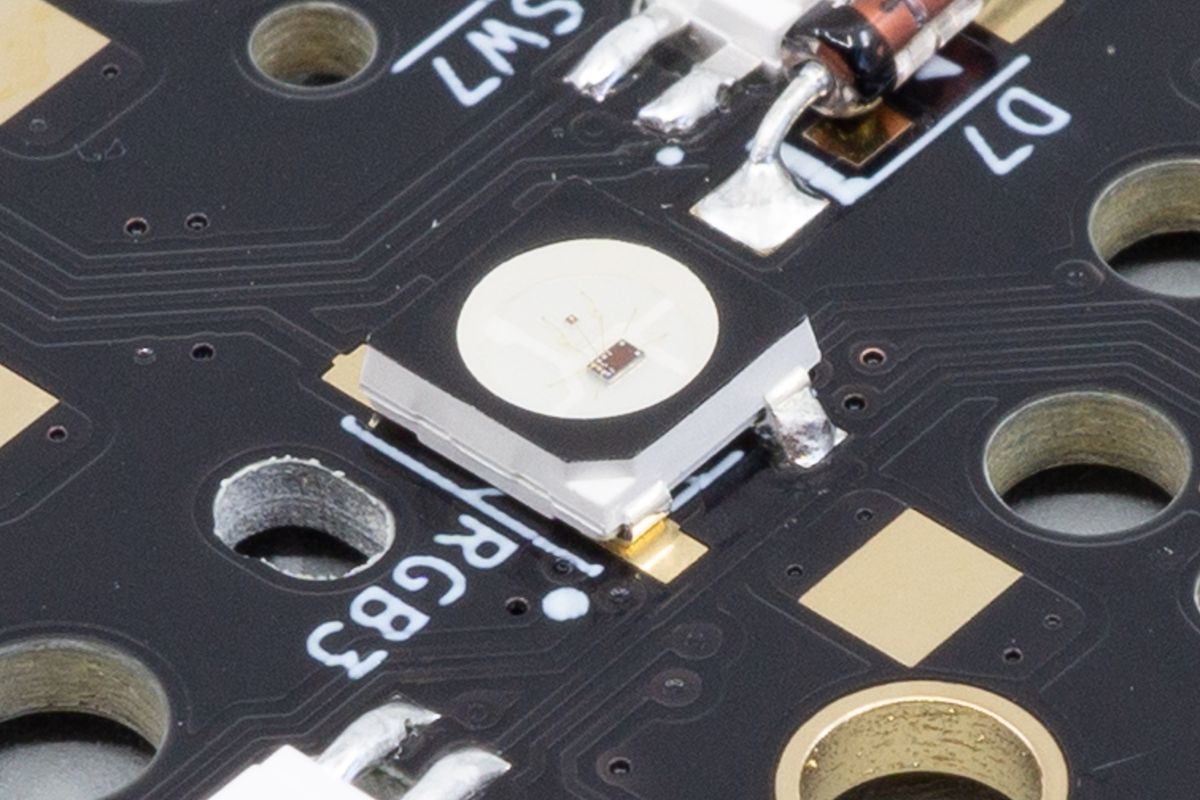
One joint soldered on a WS2812B RGB LED.
What if my joint is bad?
Any of the joints above may still work when you're testing your keyboard. However, bad joints can be unreliable: even if they work now, they may start to fail in the future, whether that's a few moments from now or a few months.
To fix a joint, you'll need to rework it. Reworking is the process of heating up an existing joint to reshape it. Sometimes heating it back up is all that's needed, and other times you may need to add or remove solder.
Reworking a joint
To rework a joint:
- First, melt the joint. Push the tip of your soldering iron against the joint. If this proves to be very tough, it can help to apply just a little extra solder, which increases the surface area of your soldering iron's tip, making it that much easier to transfer heat to the joint.
- After the joint has molten, apply the soldering iron to both the pad and the pin at the same time. This allows them both to heat up, which gives the solder a better chance to adhere properly.
- Often, when the joint already has enough (but not too much) solder, the heat of the pad and pin will pull the molten solder taut toward their surfaces. If you pull away your iron, you'll find a well-formed joint.
If the joint doesn't have an appropriate amount of solder, continue with one of the steps below.
Adding solder
If your joint doesn't have enough solder to form a nice volcano-like shape, you may need to add solder to the joint. Just a little bit can already do a lot!
Removing solder
If you've previously applied too much solder, the joint can look like a blob. You may need to remove solder from the joint. Using a tool such as a solder sucker or desoldering braid will help you here. Both are affordable tools, and are useful to have in your toolkit.
Both a solder sucker and desoldering braid can be applied after the joint has molten. A solder sucker simply sucks up molten solder, while desoldering braid uses capillary force to move molten solder into it as it's heated up.
When using desoldering braid, you'll find that the large surface area as well as the conductivity of the copper will quickly drain the heat from your iron. You may need to greatly increase the temperature of your iron to work with the braid.
Reworking tips
If a joint just won't start to melt even after increasing the temperature, it can help to use flux. Most solder already has a flux core, so in a pinch you can apply a bit of extra solder and you may find that the joint will flow more easily.
Be sure to apply enough heat. Don't be afraid to increase the temperature of your soldering iron. Also see Dialling in your iron's temperature.
Do not apply heat for too long. You'll only need to touch the joint for a few seconds to melt it. Usually, you'll only need to touch a joint for about five seconds in total.
When in doubt, pull away from the joint to let it cool down, and try again. A joint is usually cooled off in about ten to fifteen seconds.
We can't say it enough: do not apply excess pressure to a joint. Especially when working at high temperatures, applying excess pressure can slide the copper pad away from the PCB's substrate, causing a so-called "lifted pad". You of course do need to press onto the pad and pin so that they can heat up, but there's no need to apply pressure beyond making sure the tip of the iron comes into contact with the pad and pin.
Dialling in your iron's temperature
The temperature of your soldering iron greatly affects your ability to form good joints.
Desoldering
Undoing a soldering joint to remove a component.

