What are tenting and tilting?
Most keyboards are flat, but on many keyboards there's a possibility to unfold two little legs on the underside to apply a slight angle to it. There are many ways in which you can apply an angle to your keyboard that can make a significant difference to your experience.
What are tenting and tilting?
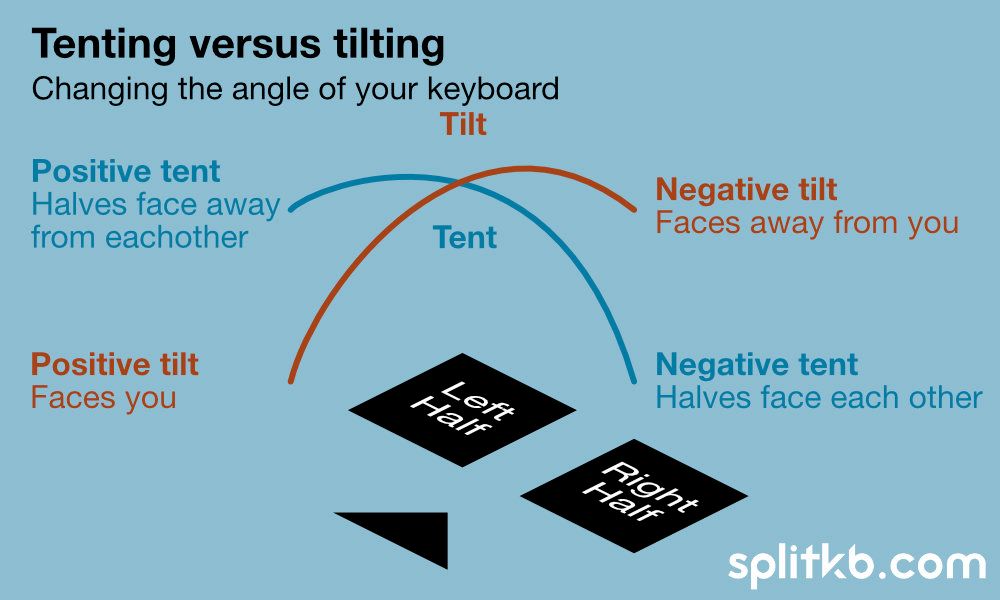
The angles you can apply to a keyboard are described using two terms: tenting and tilting.
- Tenting is the angle of the axis that goes from your left side to your right side. Usually, the more positively a keyboard is tented, the more its keys will face away from the center. If the keyboard lays flat on your desk, it can be said that it is "untented", or tented at an angle of 0°. An angle of up to 45° is often reported as comfortable, with angles over that being too extreme for many people.
- Tilting is the angle of the axis that goes from the front of the keyboard to the back. A positive angle means the keys of the keyboard face toward you, a negative angle instead faces the keys away from you. Most keyboards have an angle between 0° and 8° by default, though some report that a negative angle is actually be more comfortable.

A diagram describing the difference between tenting and tilting on a split keyboard.
How can I tent or tilt my keyboard?
There are many ways to apply an angle to your keyboard!
- A book is one of the easiest ways to apply a little angle. Depending on the angle you put it and the surface of your desk, this can be a stable and affordable way to try out various angles.
- Cardboard is more flexible than a book, but might require a bit of work with scissors and tape. It's one of the cheapest ways to try out various angles, and it can make for a fun weekend project depending on how fancy you get!
- Rubber bumpons are plastic cones with an adhesive backing. They're a more permanent way to provide an angle. While they make your keyboard less portable, it's also flexible and affordable.
- A 3D printed base is one of the more high-tech ways, and is also one of the less flexible ways, since with most bases you're locked into an angle once printed. Still, for a permanent solution this can be a good fit, since a base will always be at the angle you set it to.
- A camera tripod can be a very flexible way to tent. At splitkb.com, Thomas has designed the tenting puck, which is an adapter that mounts to the bottom of the Kyria and future splitkb.com keyboards. This adapter allows you to attach any common camera tripod. This gives you a lot of flexibility, and depending on what you go with, it'll keep your keyboard portable.
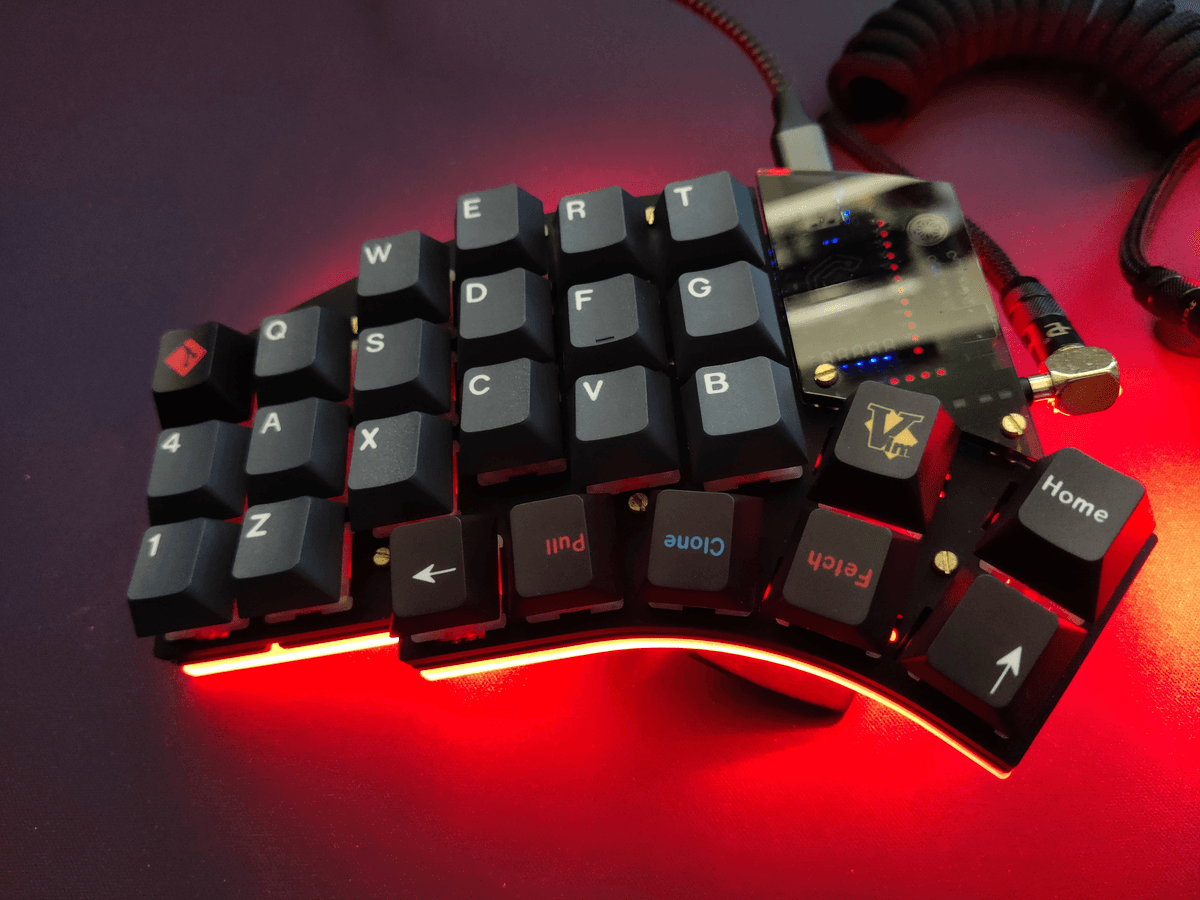
Shown below is a Kyria, fitted with the tenting puck (which is slim enough to sit flush with the bottom plate of the case) and a Manfrotto MP3-BK pocket tripod. The tripod folds down very slim, and can be easily removed for transport. The low profile of the puck alSlows you to keep using it untented too when you're out and about if you so desire.

A tented Kyria rev 1.4. Picture by Discord user Kyek.

