RGB underglow
You should perform this step if you chose the WS2812B underglow RGB LEDs. If not, you can go to the next step using the button below.
RGB underglow LEDs are distributed along the PCB, illuminating the bottom of your keyboard. They are marked by RGB followed by a number, for example RGB3. They are optional, you only need to do this step if you’ve purchased RGB underglow LEDs with your kit.
The underglow LEDs can be oriented in two ways. It is absolutely crucial that you get the orientation right. Familiarize yourself with the orientation markers on both the LED and the PCB: The LED will have a single angled corner, the PCB will have a dot marking one pin.
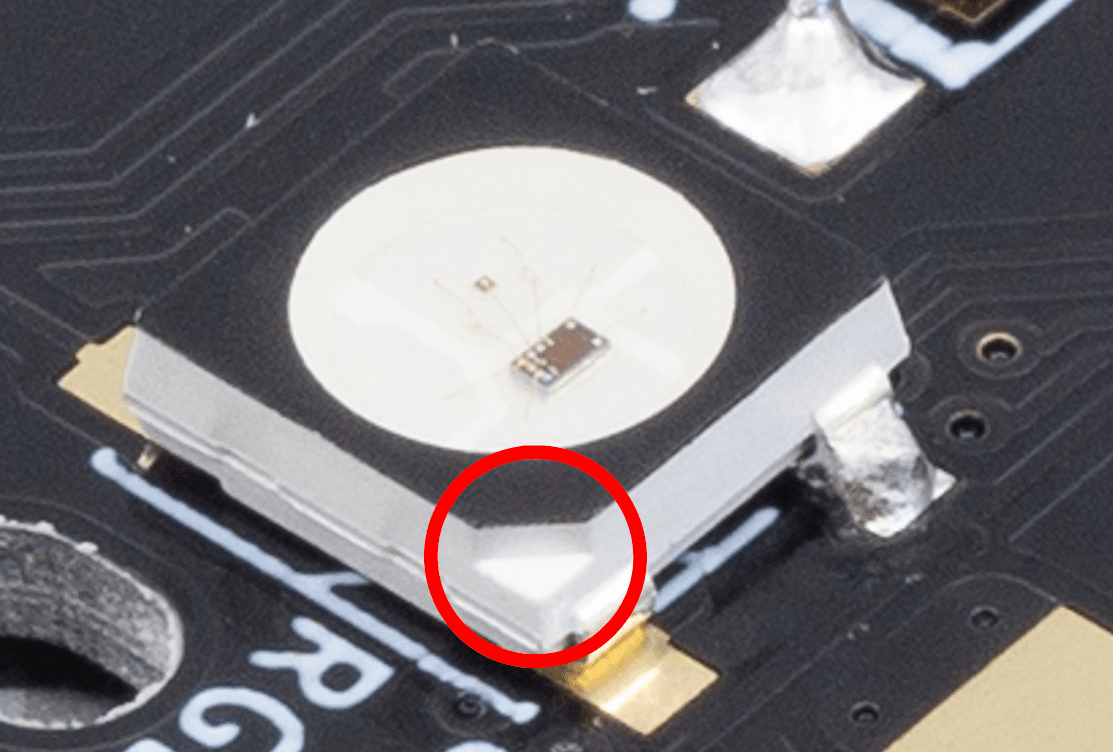
An angle on the top side of the LED hints at the orientation.
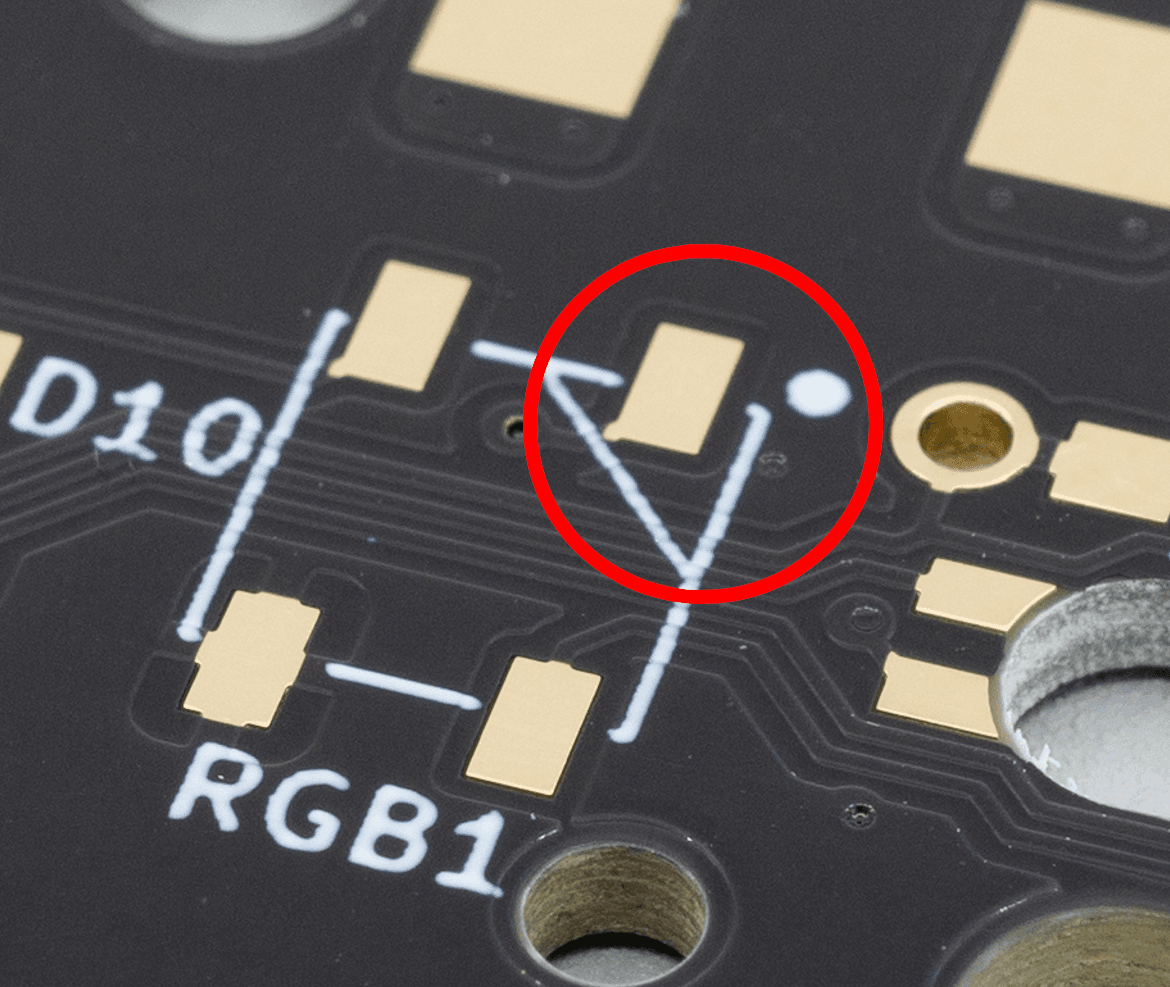
The same angle on the PCB footprint will correspond with the orientation. There's also a dot, so you can still check the orientation after soldering.
Once you have figured out the orientation, solder a little bit of tin to the first pad. This will make soldering the other pins easier.
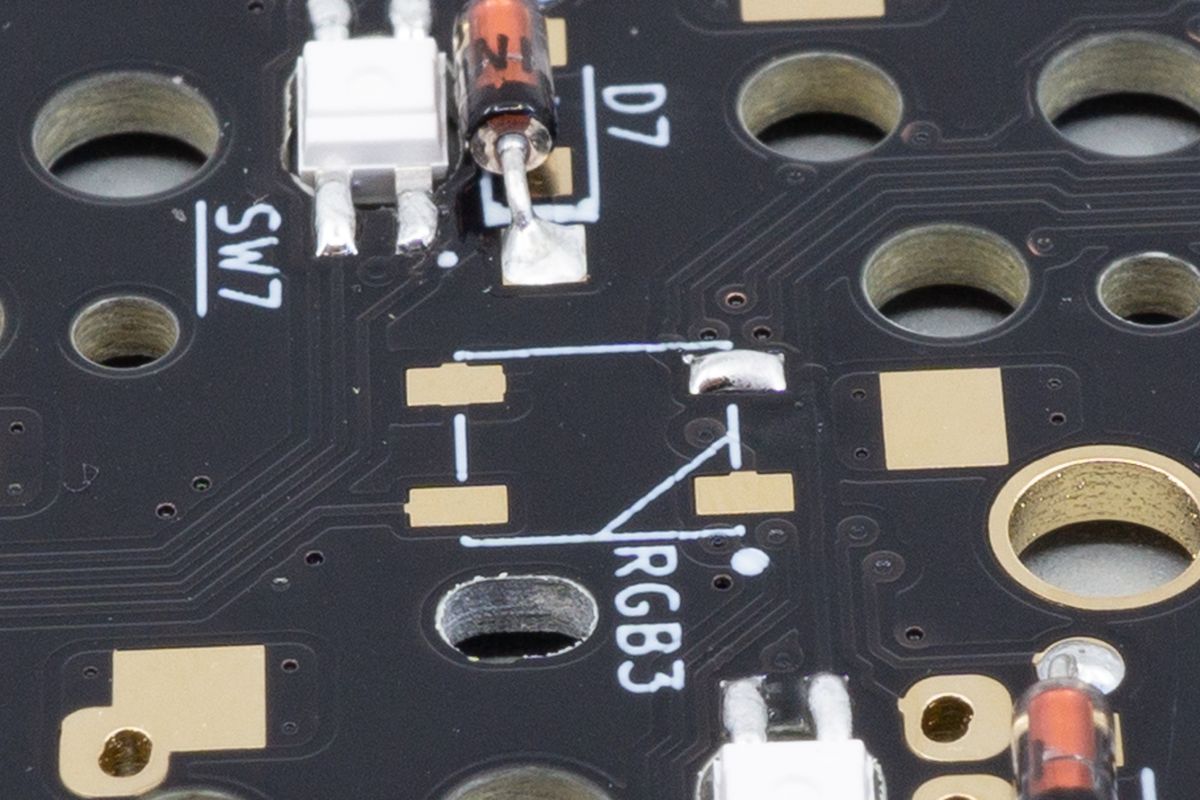
Soldering one pad first helps align the LED later on.
Place the LED on top of the pads. Make sure the orientation is correct.
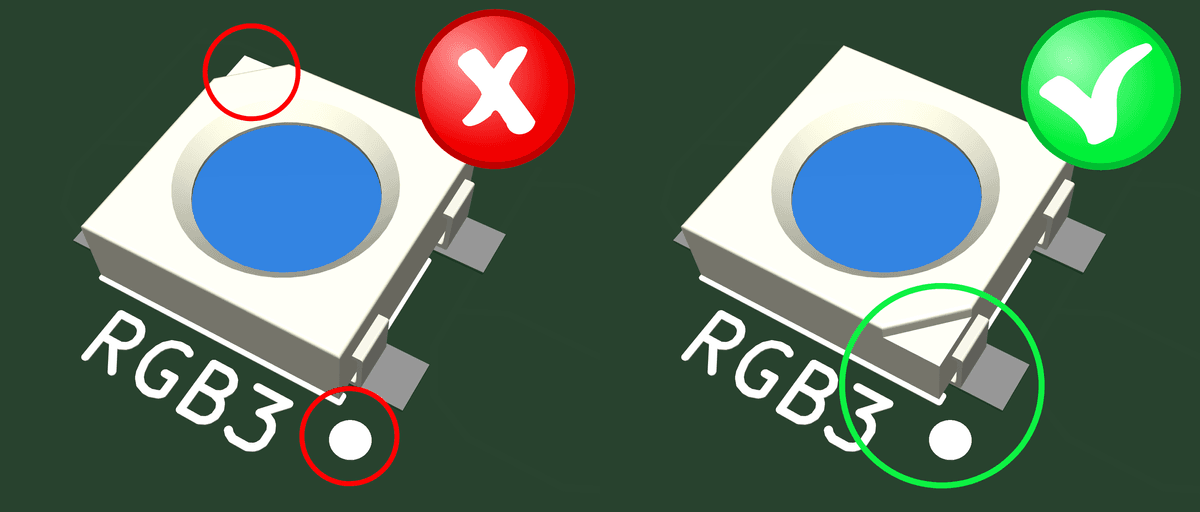
Left: an incorrectly oriented LED, notice that the angle sits on the opposite end of the dot. Right: a correctly oriented LED, with the angle matching the dot.
Solder the first pin, making sure that the other pins are aligned properly. While heating the pin with your soldering iron, use a pair of tweezers to align it.
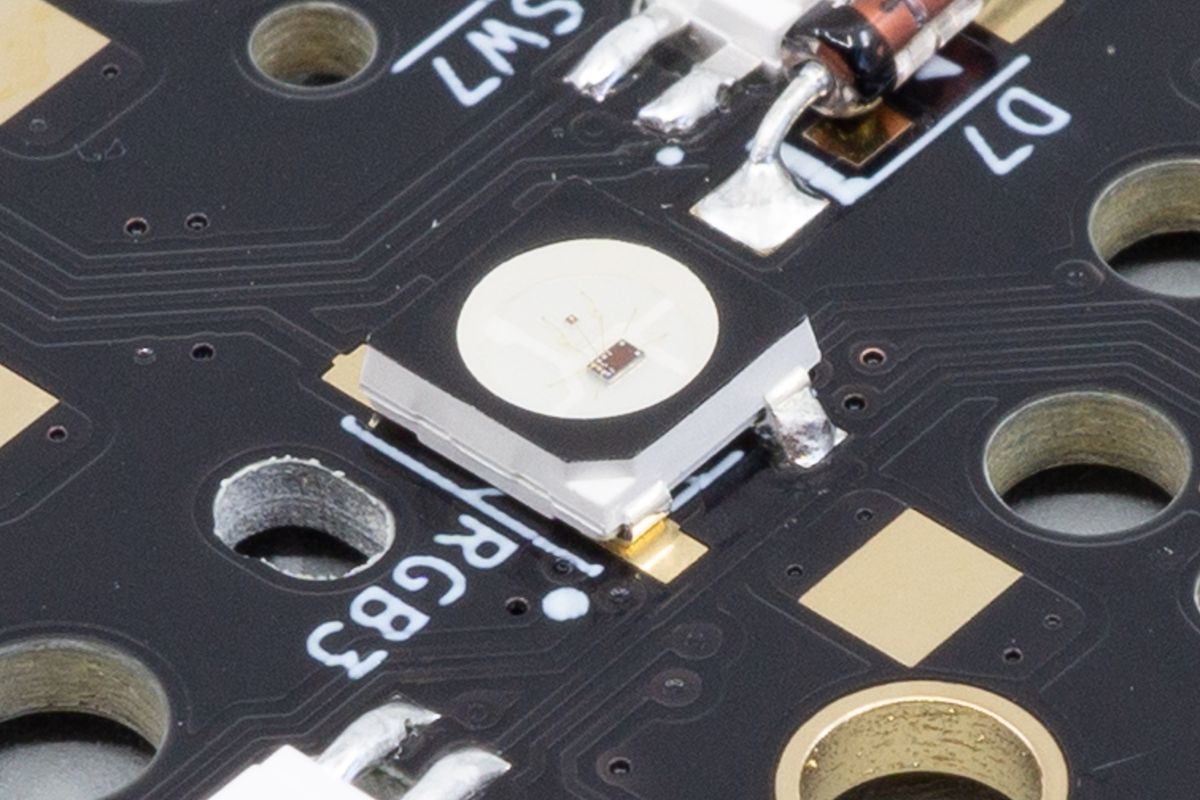
The first soldered joint on a WS2812B underglow LED.
Now solder the rest of the pins.
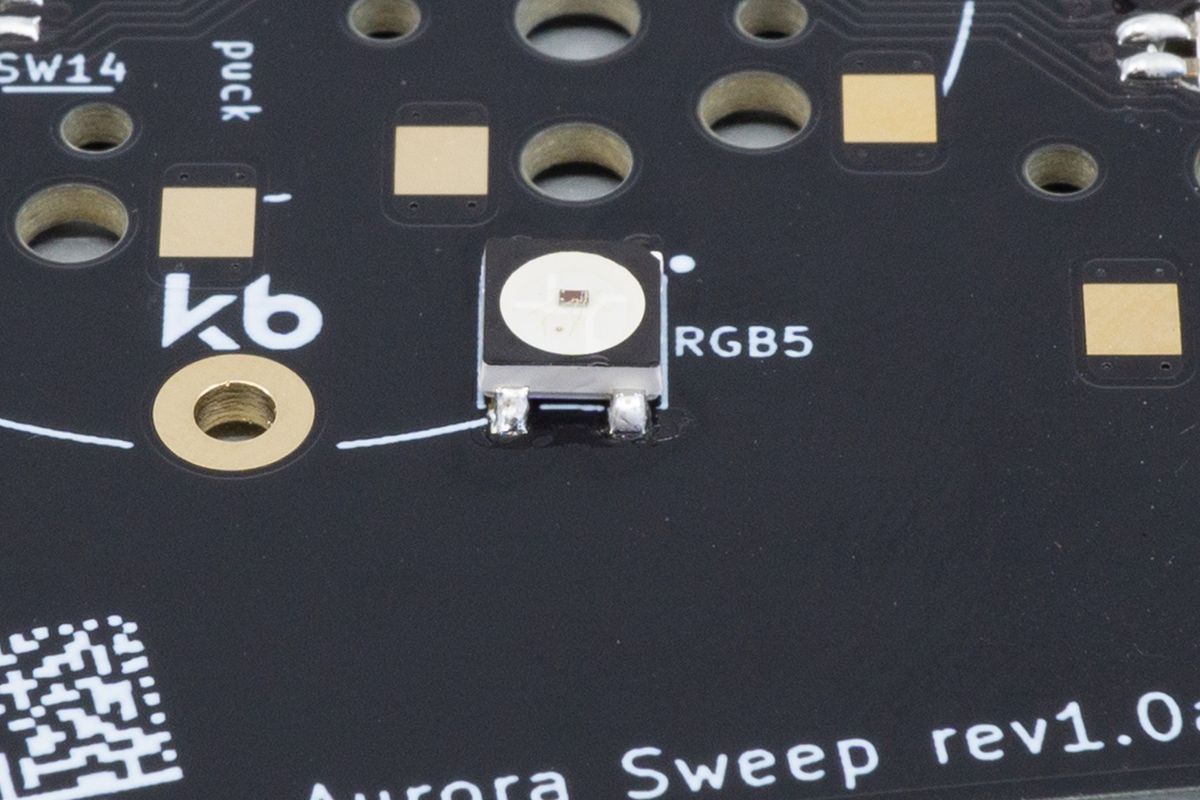
A side view of an underglow LED, showing two of the four joints.
Double-check that you soldered all LEDs in the right orientation. If they are all oriented correctly, you are done with the RGB underglow.
Per-key RGB
Light coming up through your keycaps. Learn how to solder per-key RGB LEDs.
Resistors
Resistors pull up the I2C connection, enabling I2C accessories to work correctly. Let's solder them!

