Cirque trackpad module
Setting the VIK voltage selector
For this module you will need to set the VIK voltage selector to NC.
Using a non conductive tool, this can be a spudger, guitar pick, plastic screwdriver, your fingernail or something similar, Set the VIK voltage selector to NC
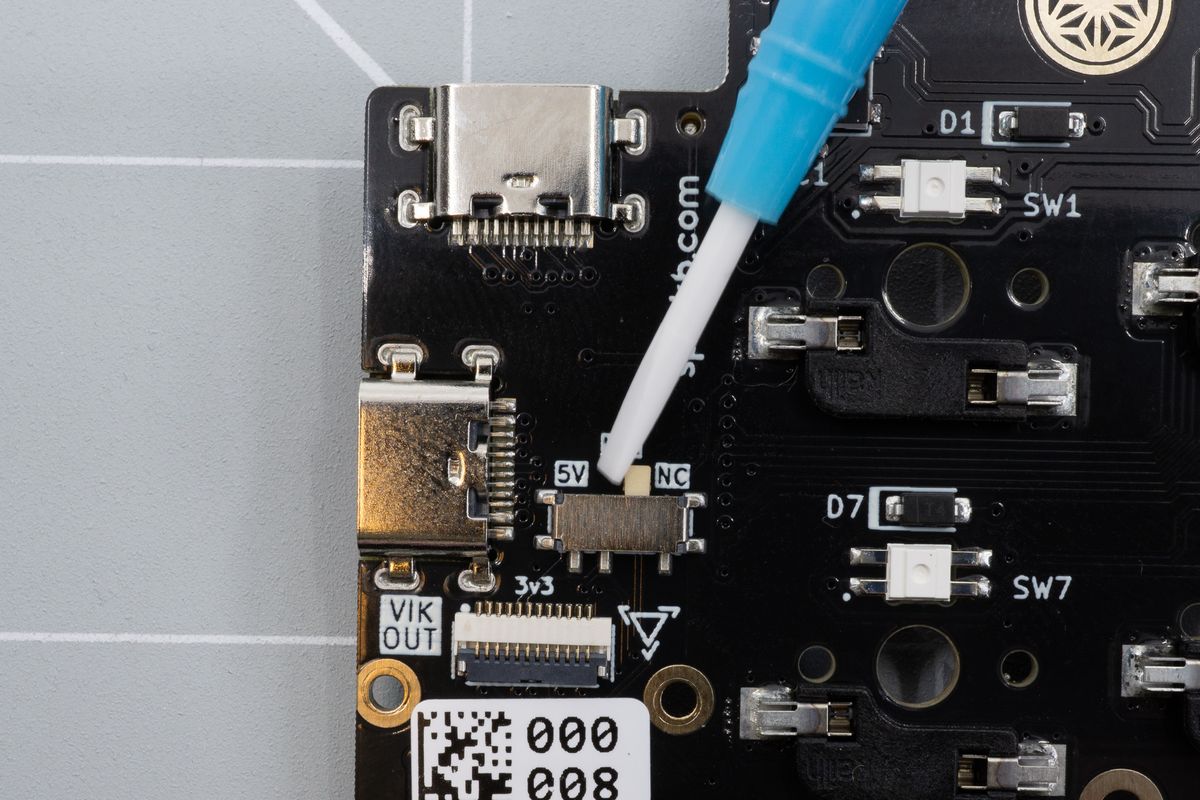
Setting the VIK voltage selector.
How to prepare the module
You will need your keyboard, the Cirque trackpad, the mounting kit, 4 short screws, 2 6mm spacers, 1 small screw, the flat cable, a flat head screw driver and the included allen key.
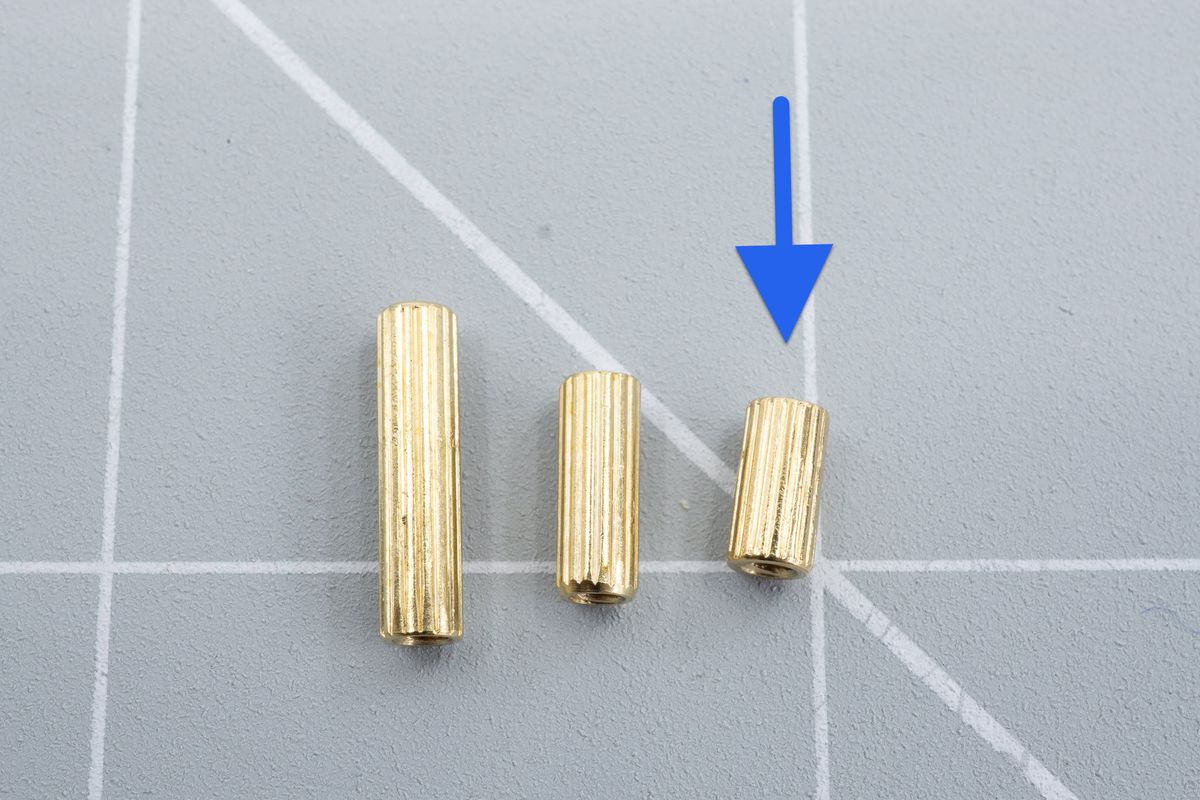
6mm spacers.
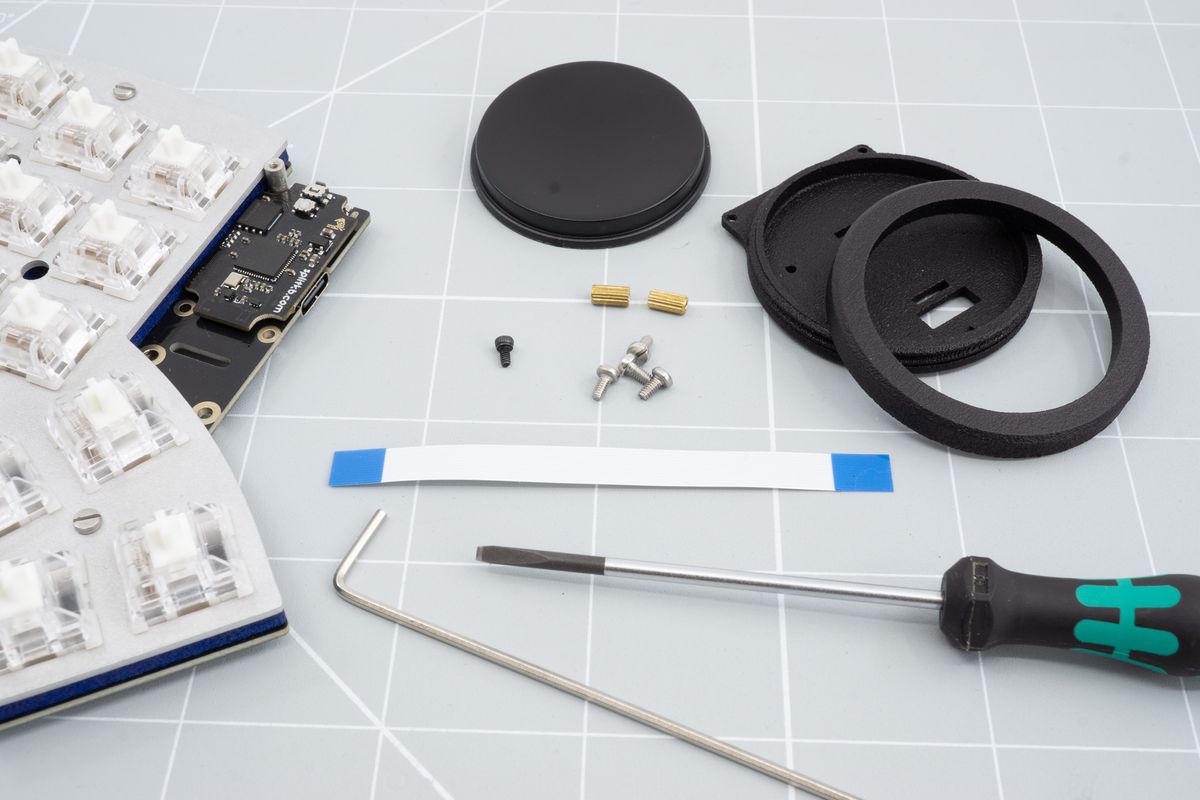
The keyboard, the Cirque trackpad, the mounting kit, 4 short screws, 2 6mm spacers, 1 small screw, the flat cable, a flat head screw driver and the included allen key.
Start by installing the spacers in to the mounting kit. You will first need align the mounting kit with the keyboard so that you screw in the spaces in the correct place. Start by aligning the mounting kit next to the keyboard. The round part should stick out of the keyboard. Notice the two mounting points on the bottom side of the microcontroller. That's where our spacers need to be screwed in to in the end. The left side is pictured here, so for the right side you will need to rotate the mounting kit 180 degrees.
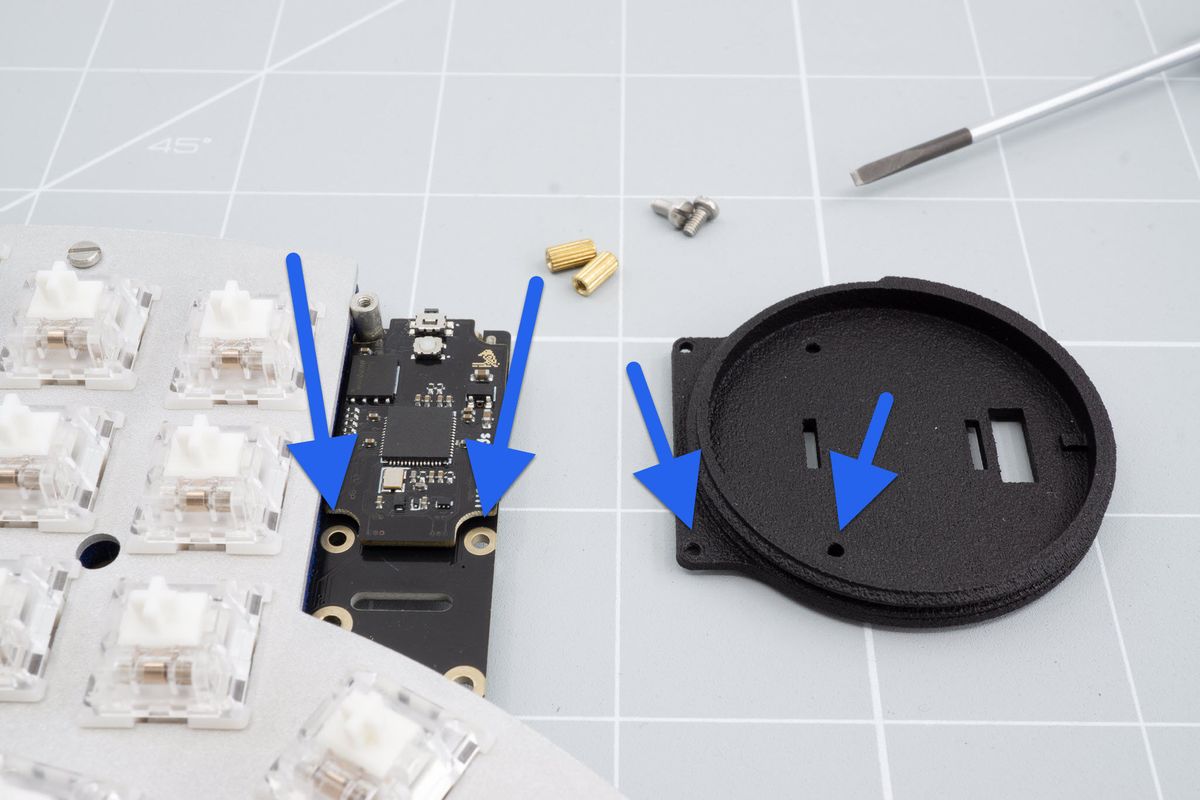
Aligning the mounting kit.
Installing spacers
Install the spacers in to the mounting kit.
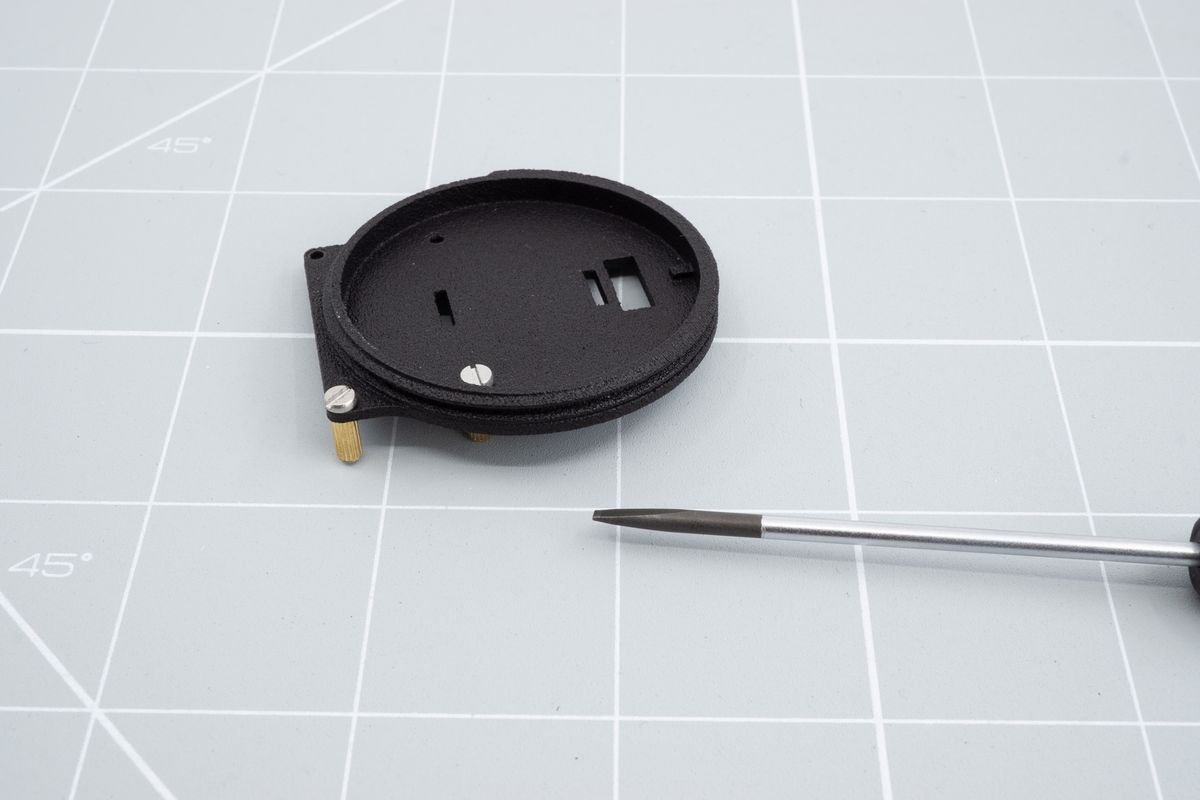
Installing the spacers in to the mounting kit.
Installing the cable
Now grab the flat cable and make sure the blue tabs are faced up.
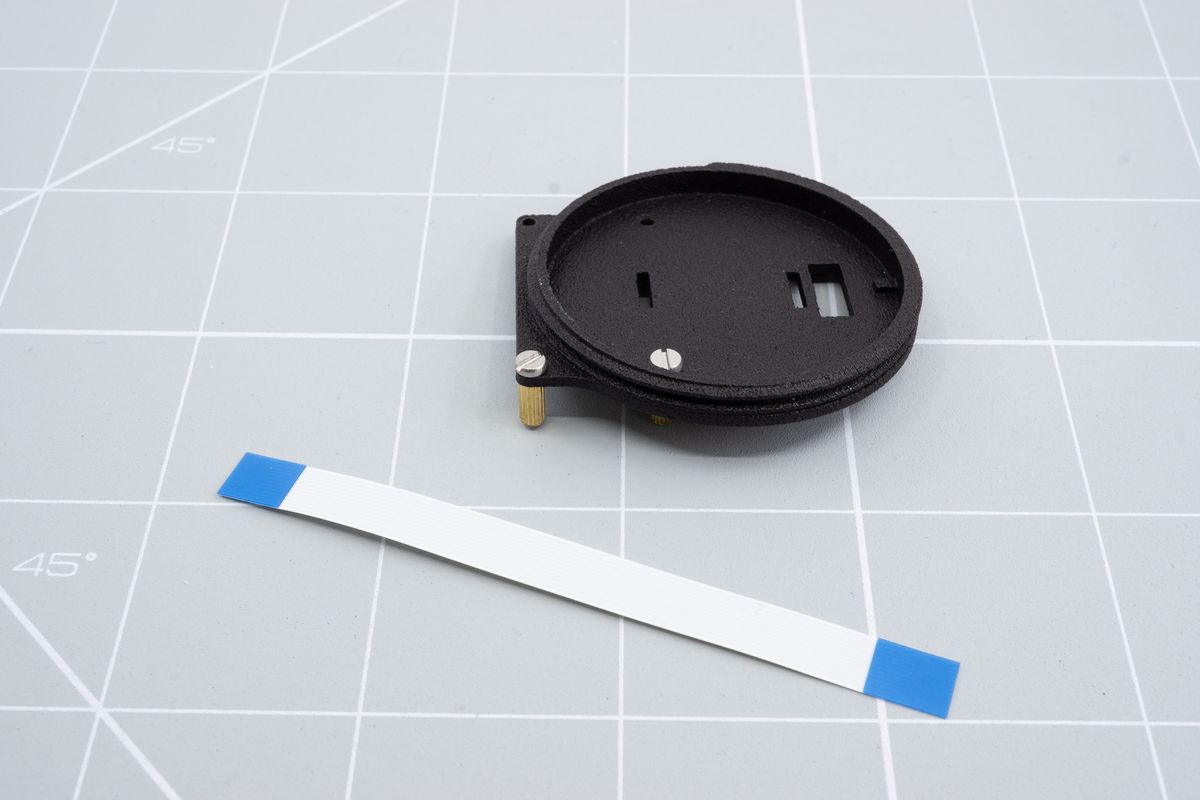
The flat cable and mounting kit.
Start by threading the cable from the bottom through the first hole.
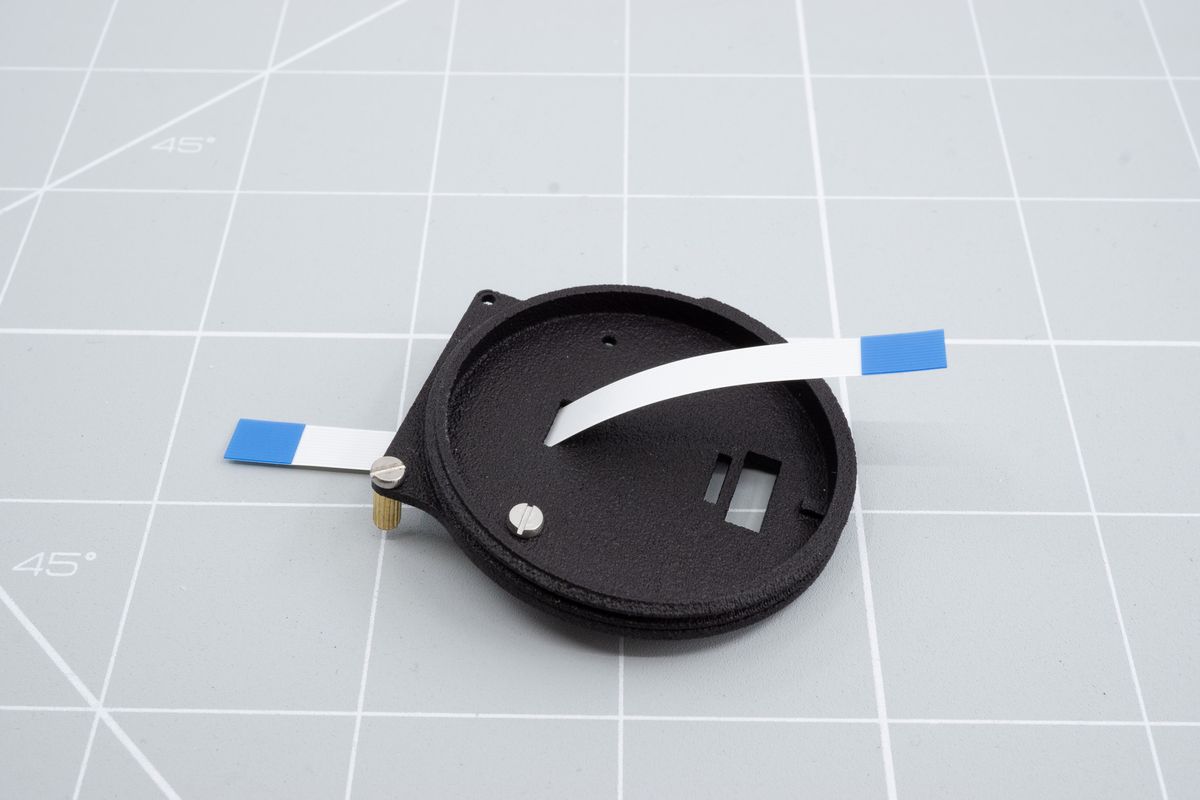
Threading the cable through the first hole.
Now thread the cable to the second small hole from the top.
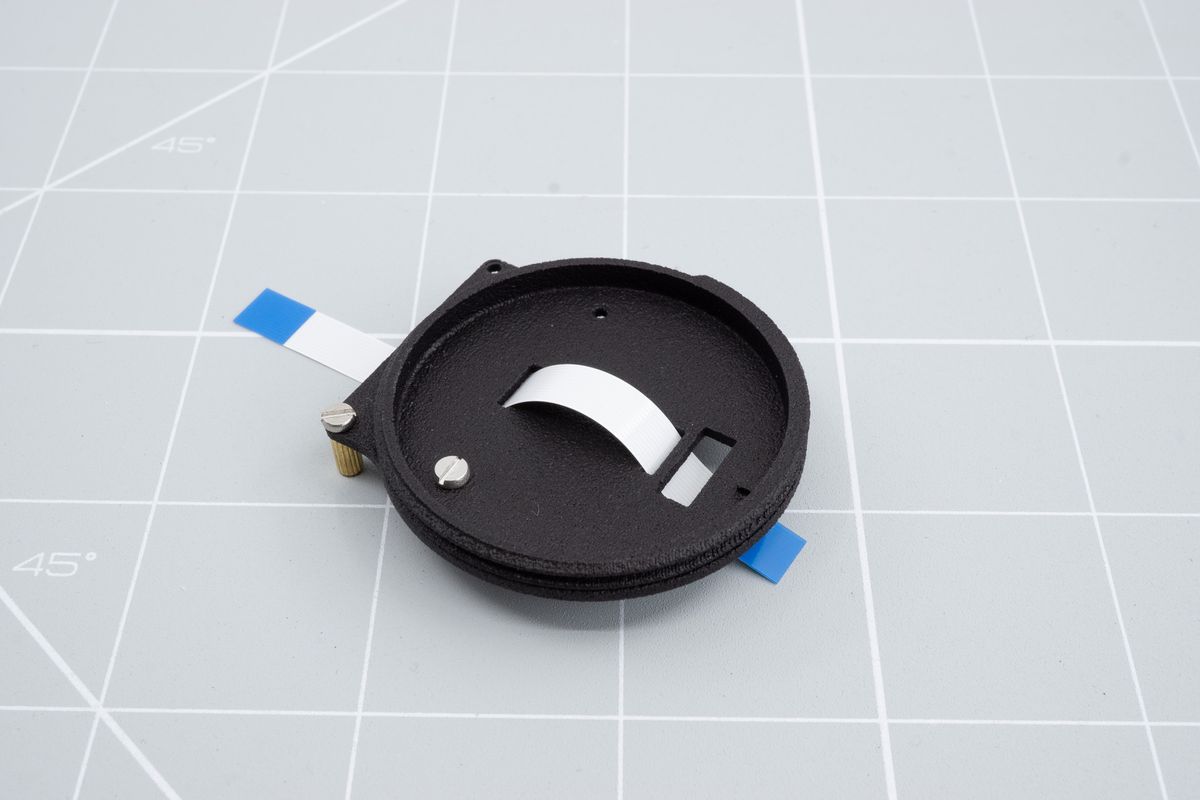
Threading the cable through the second hole.
Grab the actual Cirque trackpad and align it with the mounting kit. Notice the little notch in the Cirque trackpad and our mounting kit. Align that with each other.
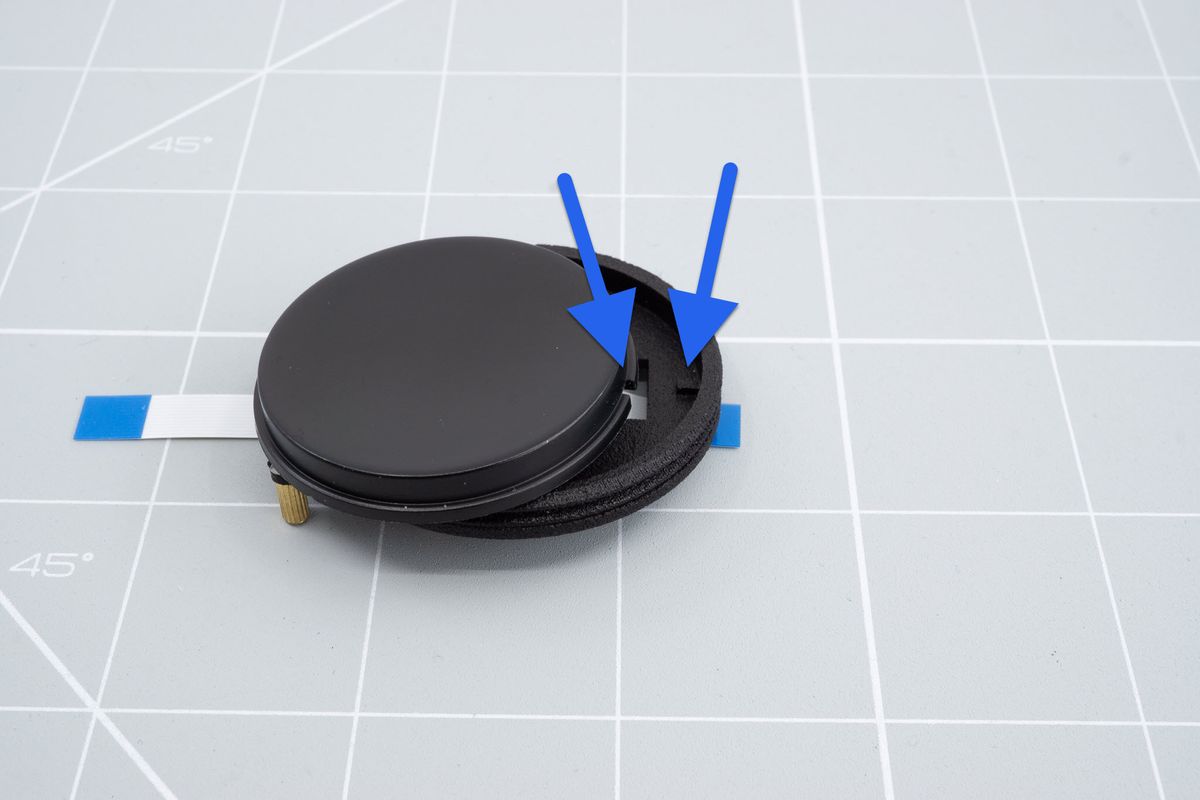
Aligning the Cirque trackpad.
Insert the Cirque trackpad and grab the locking ring.
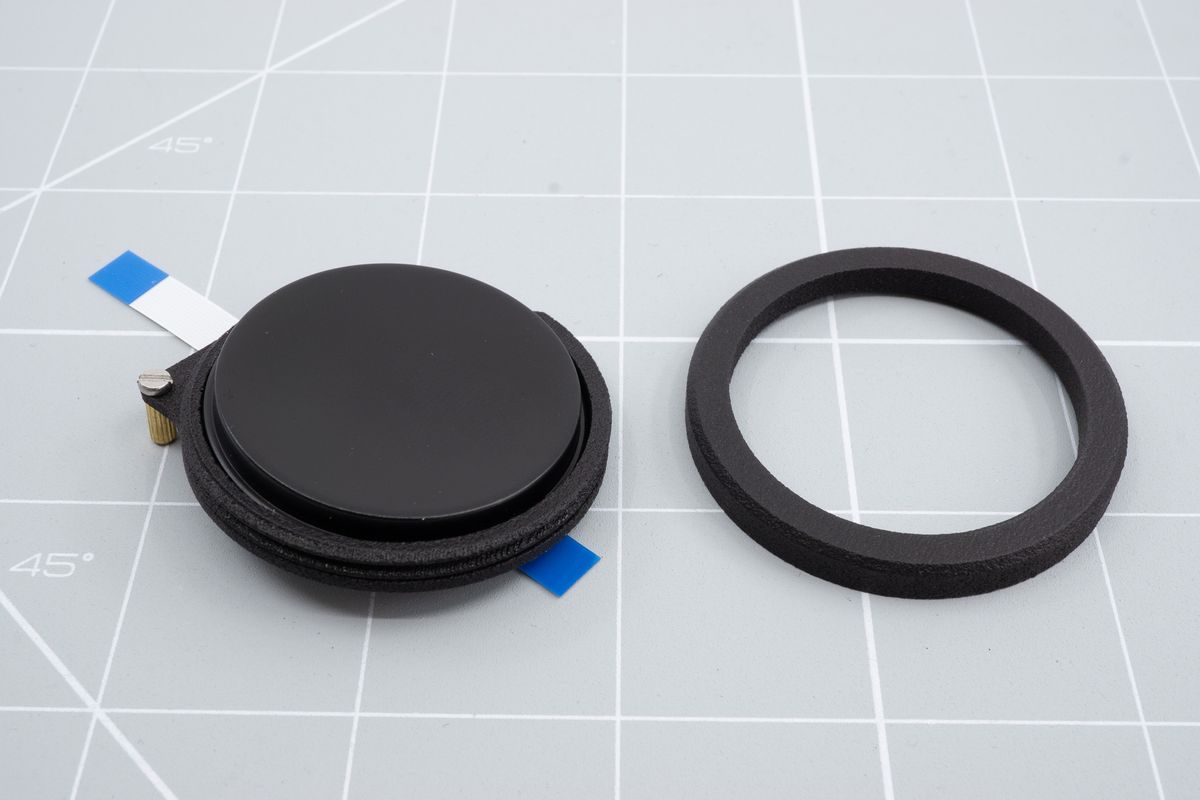
Cirque trackpad and the locking ring.
Put the locking ring on top of the Cirque trackpad and rotate clockwise. Don't screw it in all the way just yet.
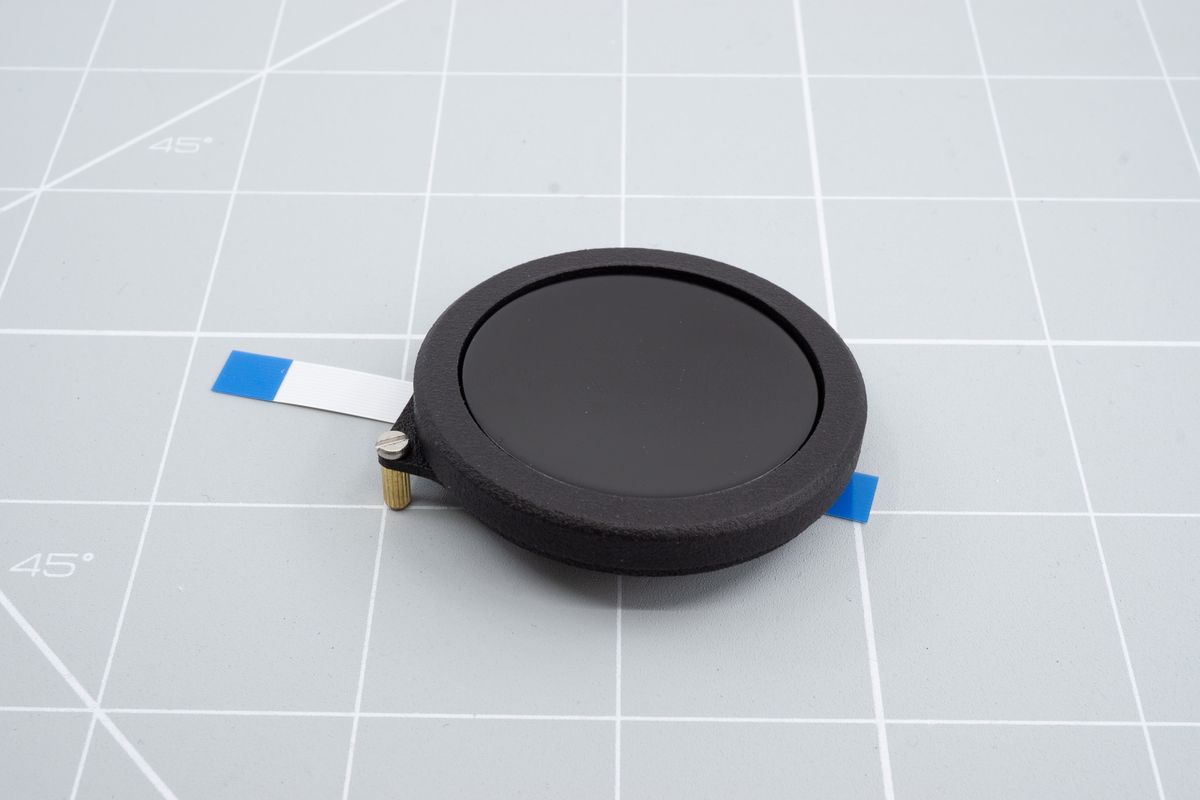
Screwing on the locking ring.
Flip over the module.
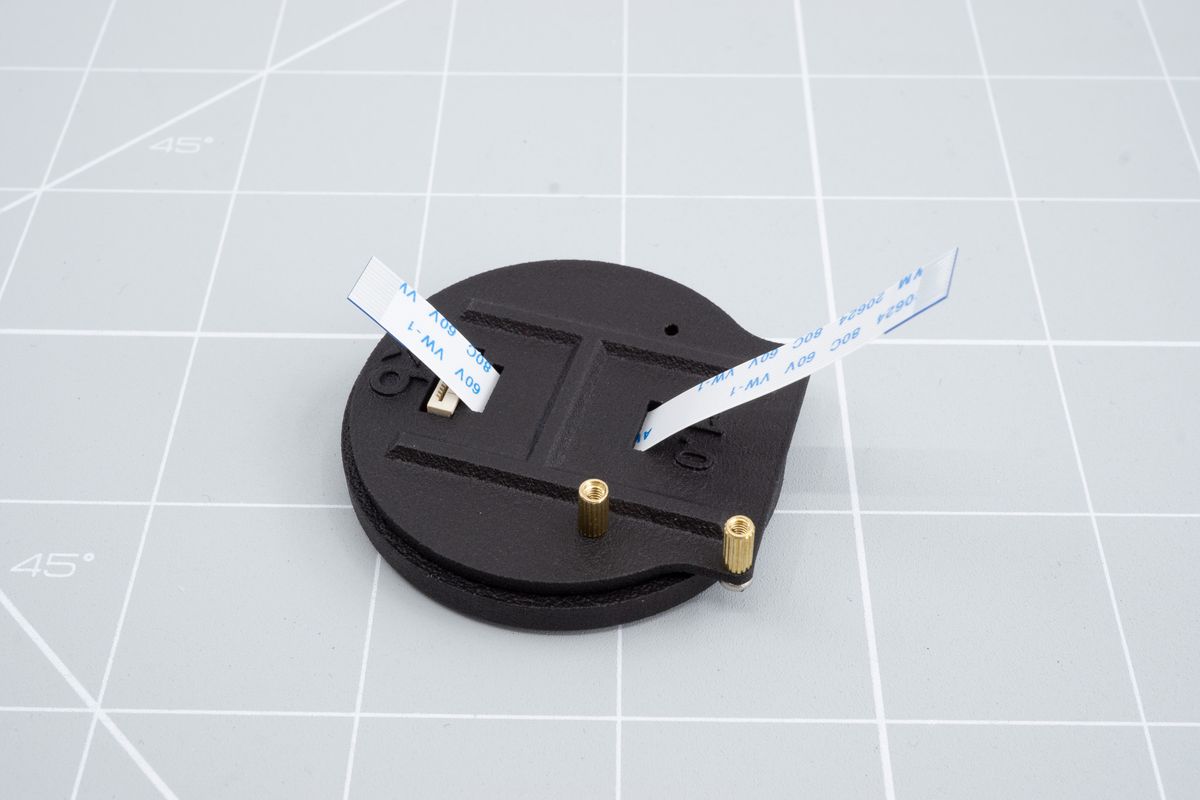
Flipped module.
Insert the cable in to the Cirque trackpad.
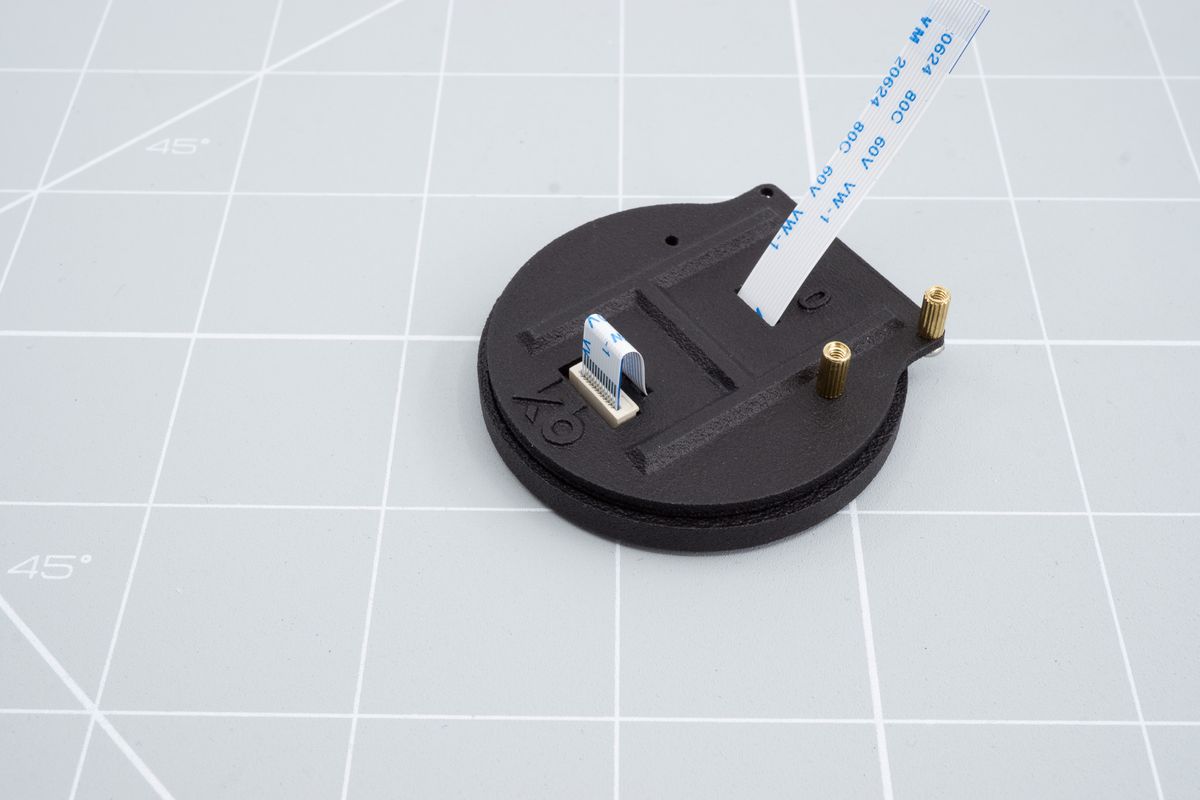
Inserting the cable in to the Cirque trackpad.
Push it all the way down until it can't go any further.
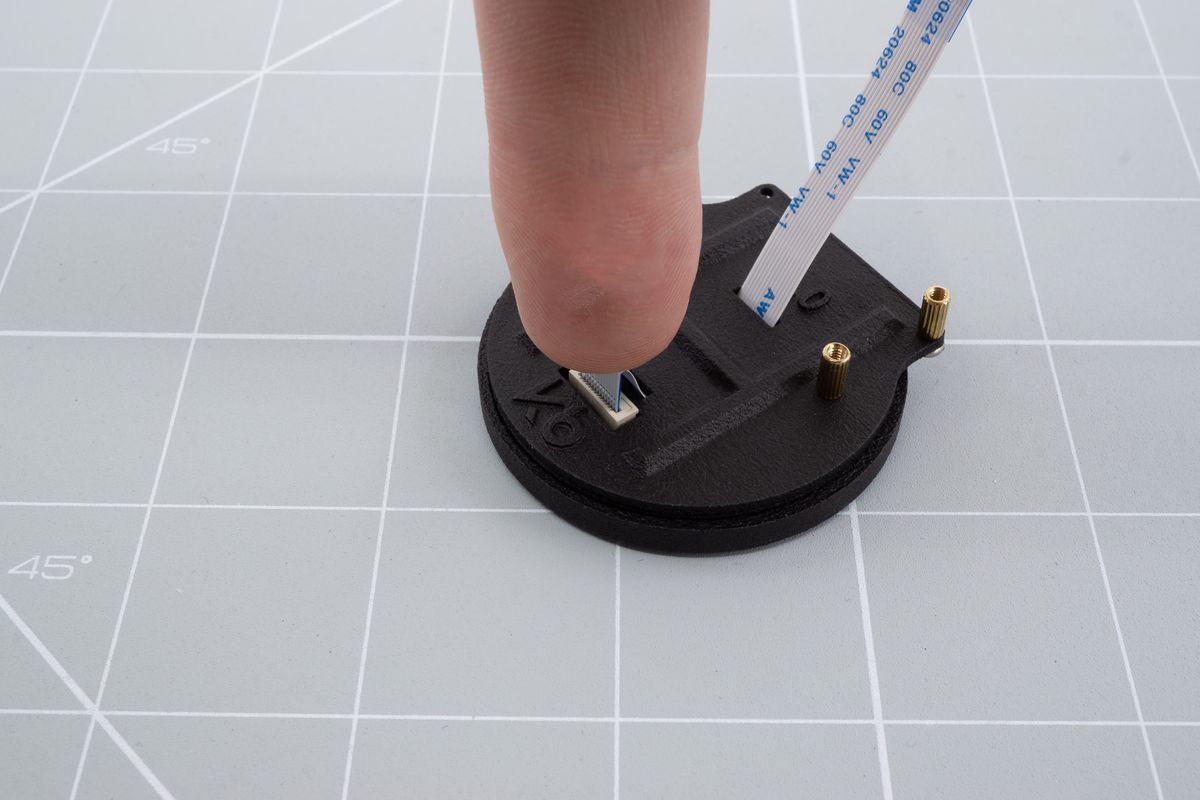
Fully inserting the cable.
Bending the cable
Bend down the cable until it's mostly flat.
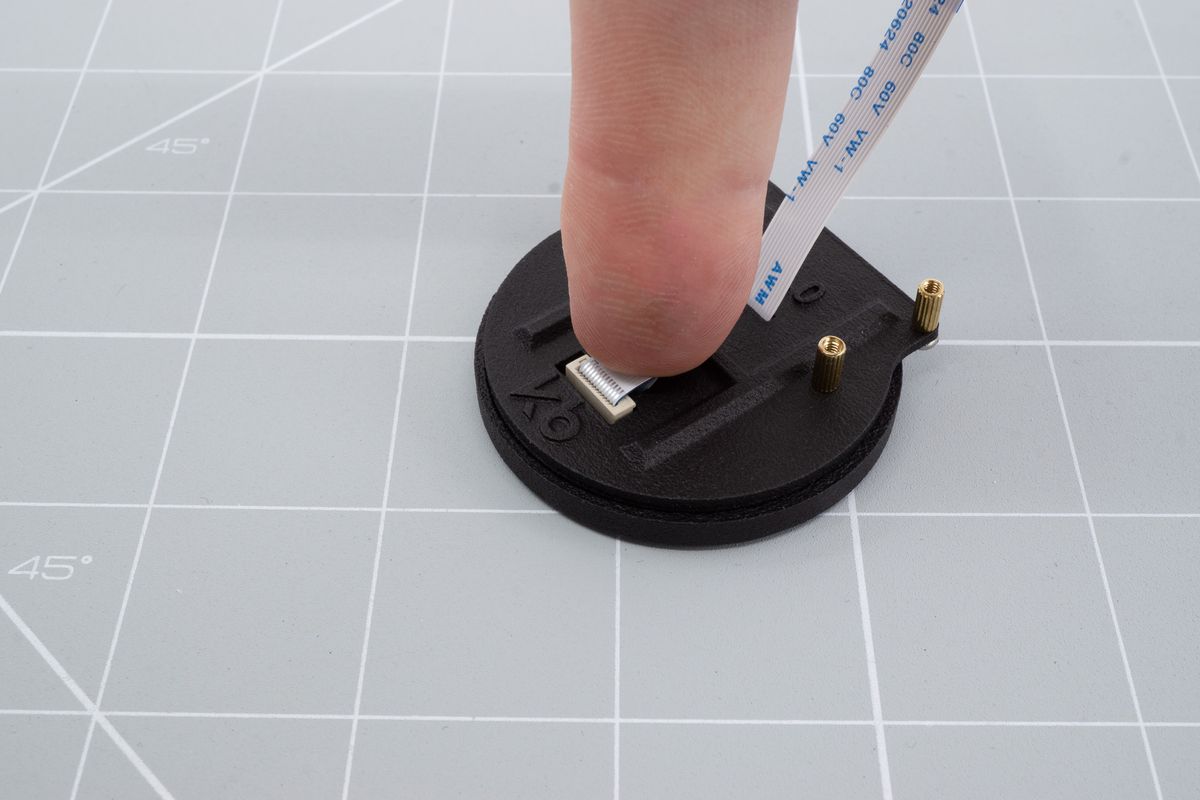
Bending down the cable.
Pull on the loose end of the cable. It should look like this in the end.
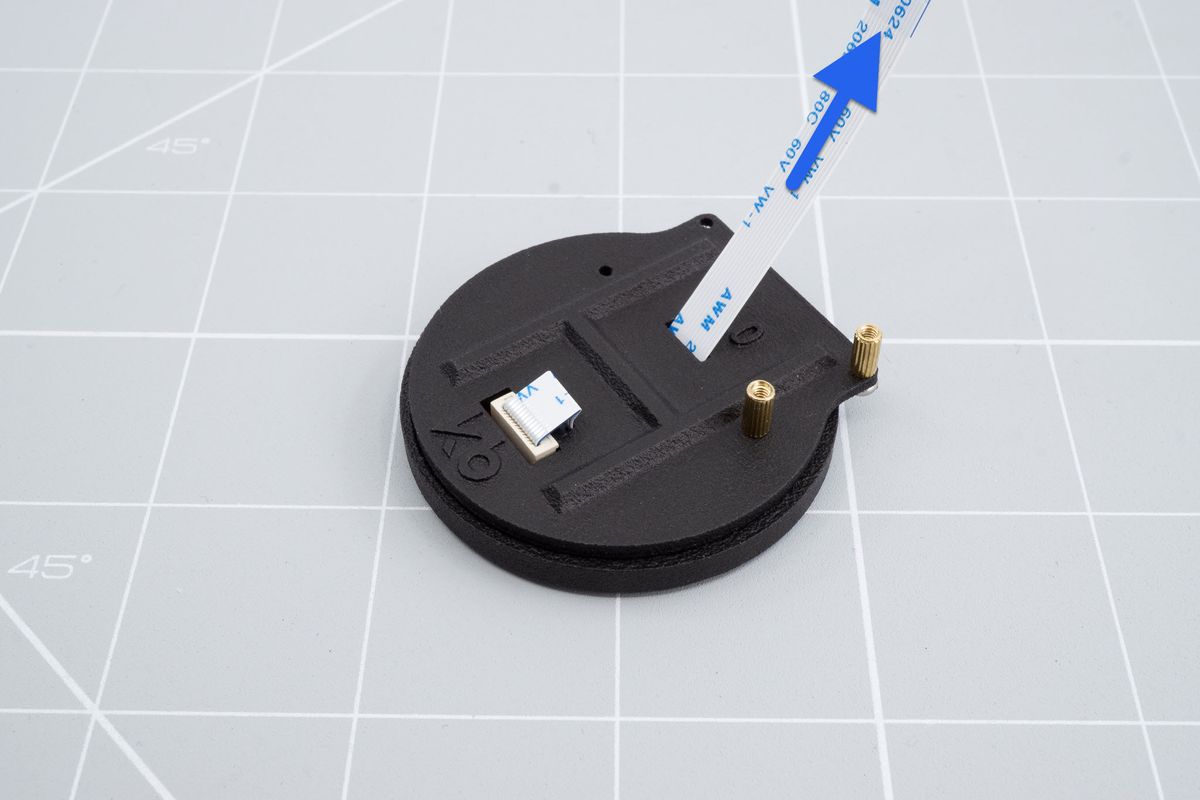
Pulling on the cable.
Now we need to bend the cable. To bend the cable, just use your fingers. The screwdriver is pictured here only to more clearly show the folds. Start by bending the cable up. This might not be intuitive but it has to do with the positioning of the cable. The cable should roughly end up in between the mounting holes/spacers.
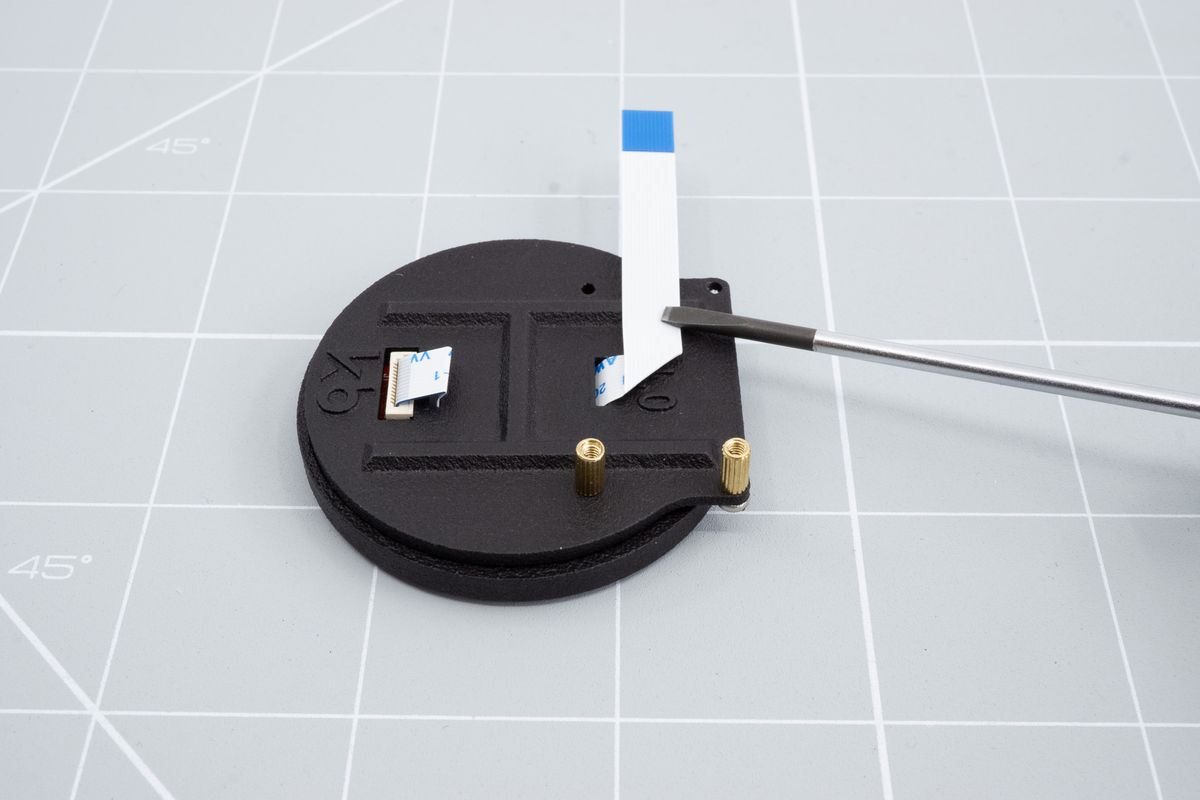
Bending the cable up.
Now bend it directly down. The pins should be exposed on the bottom.
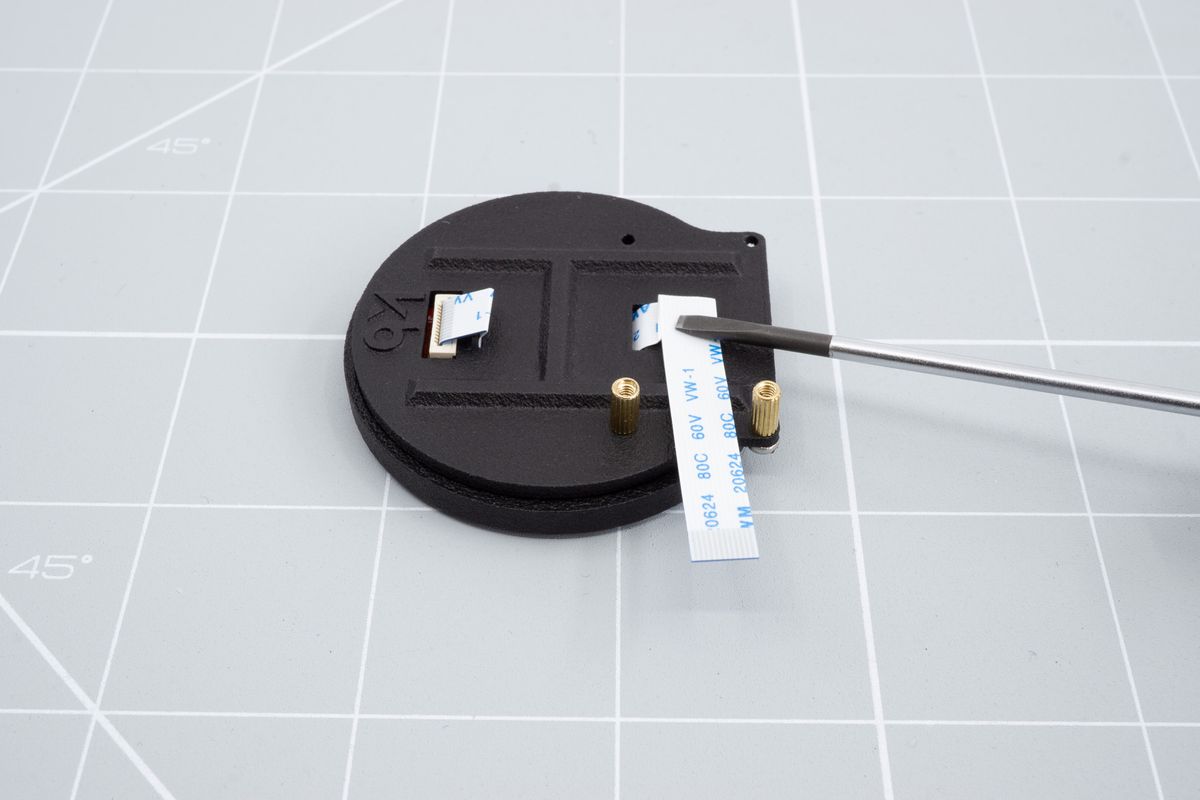
Folded cable.
Installing the module to the keyboard
Now you're finally ready to install the module on to your keyboard.
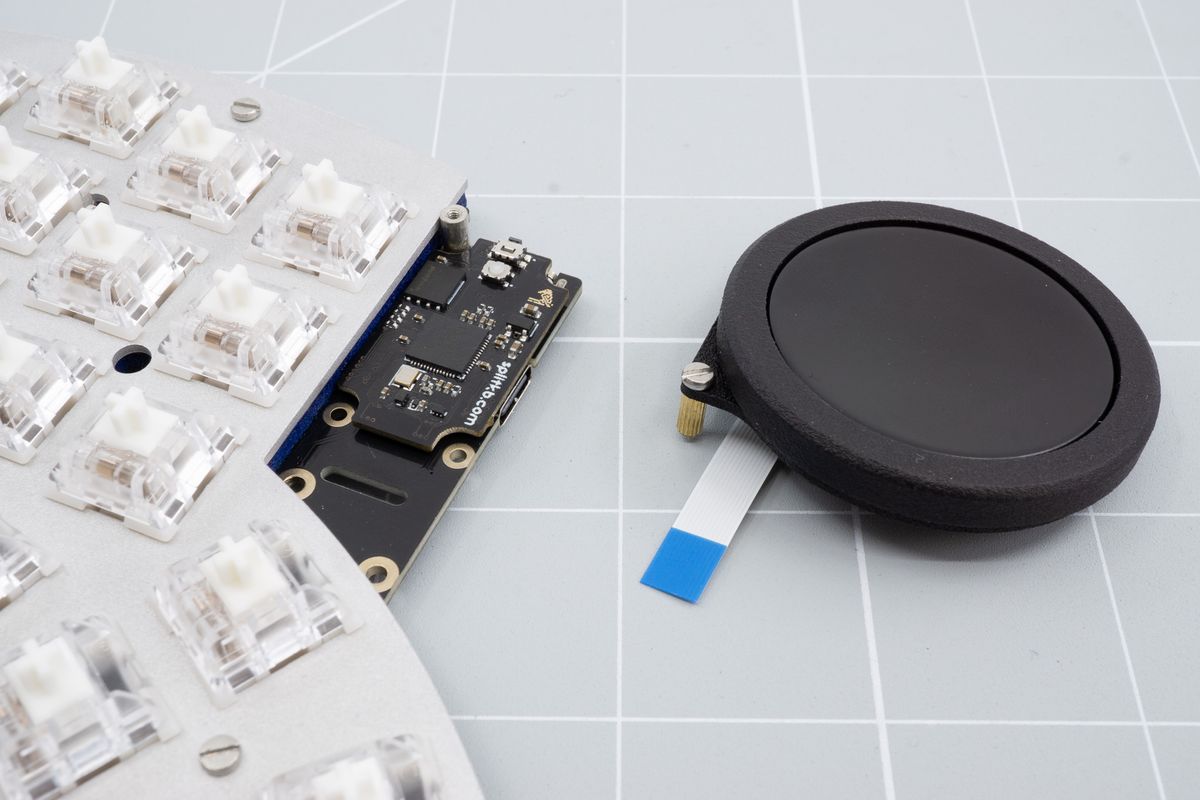
Module and the keyboard.
Insert the cable through the hole in the keyboard and push it through all the way until the module roughly lines up with the screw holes.
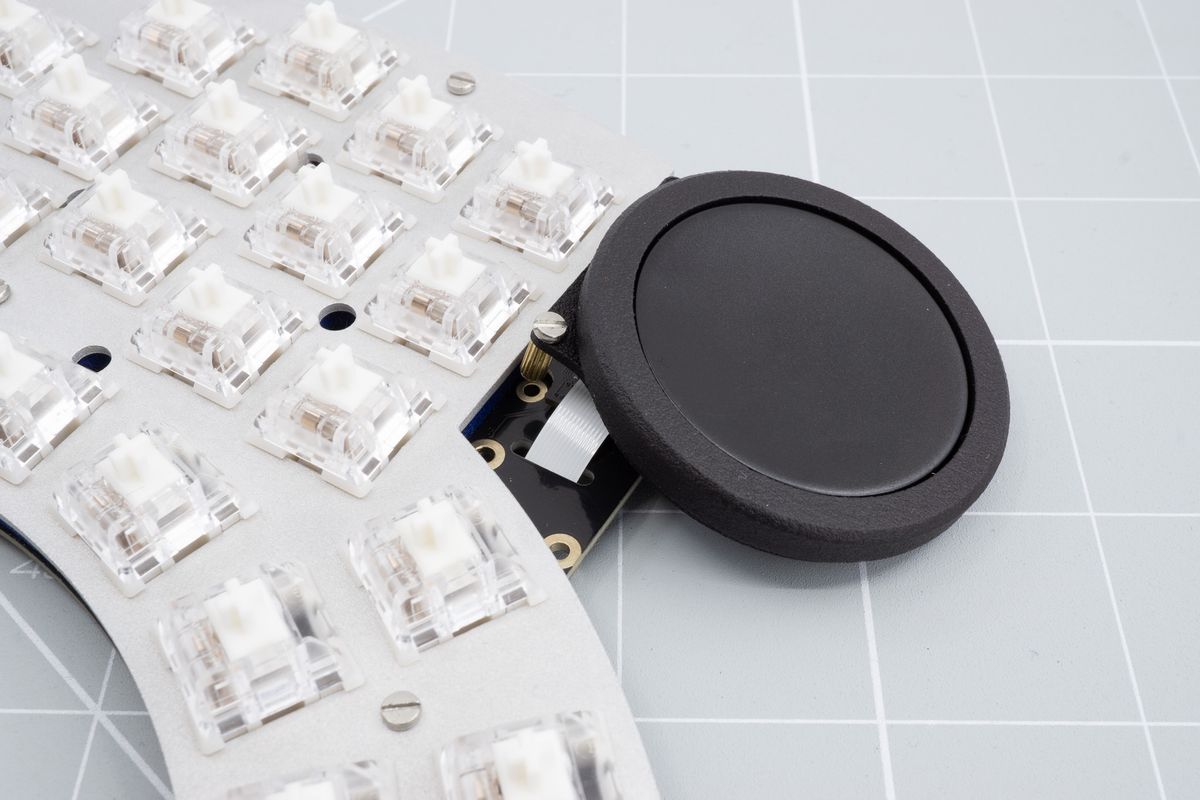
Module in the correct position.
Screw down the screw on the top of the module using the included screws and the 1.5mm allen key. Don't tighten it all the way just yet.
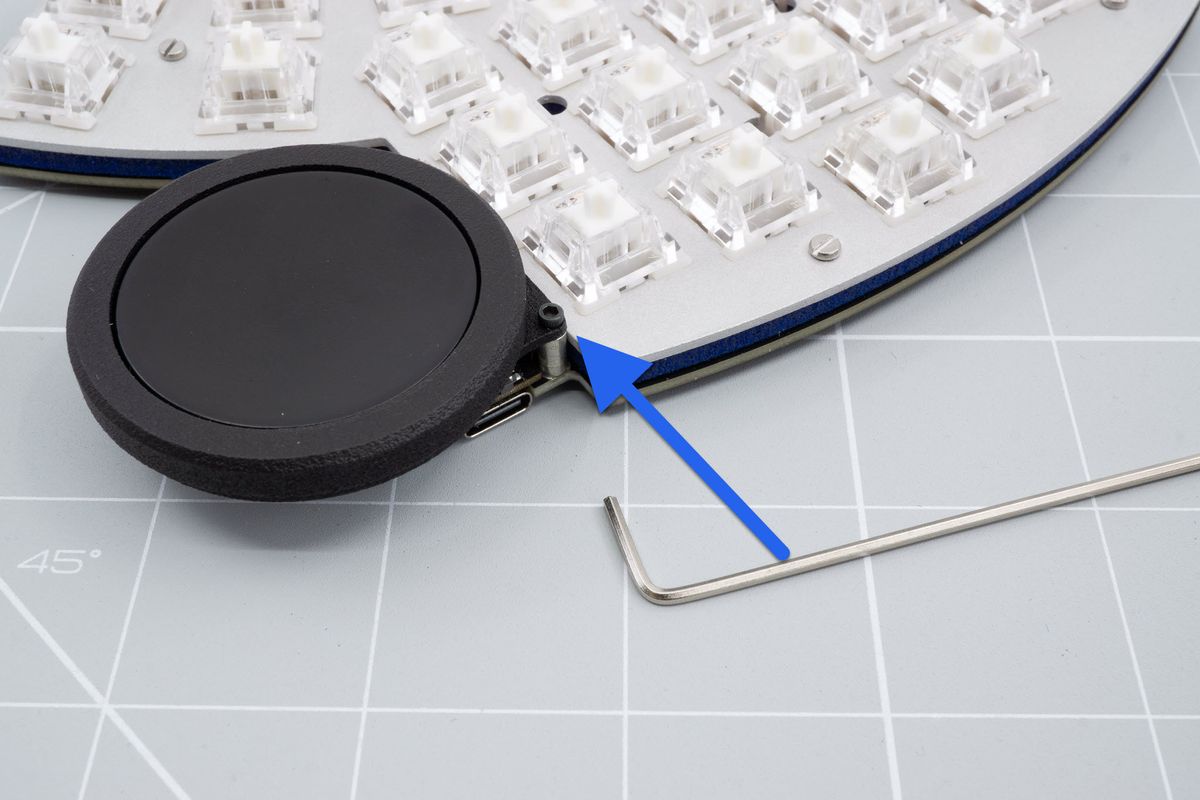
Screwing in the top screw.
Rotate your keyboard and screw in the bottom two screws using the flat head screws. Now you can also tighten the screw on the top of the module.
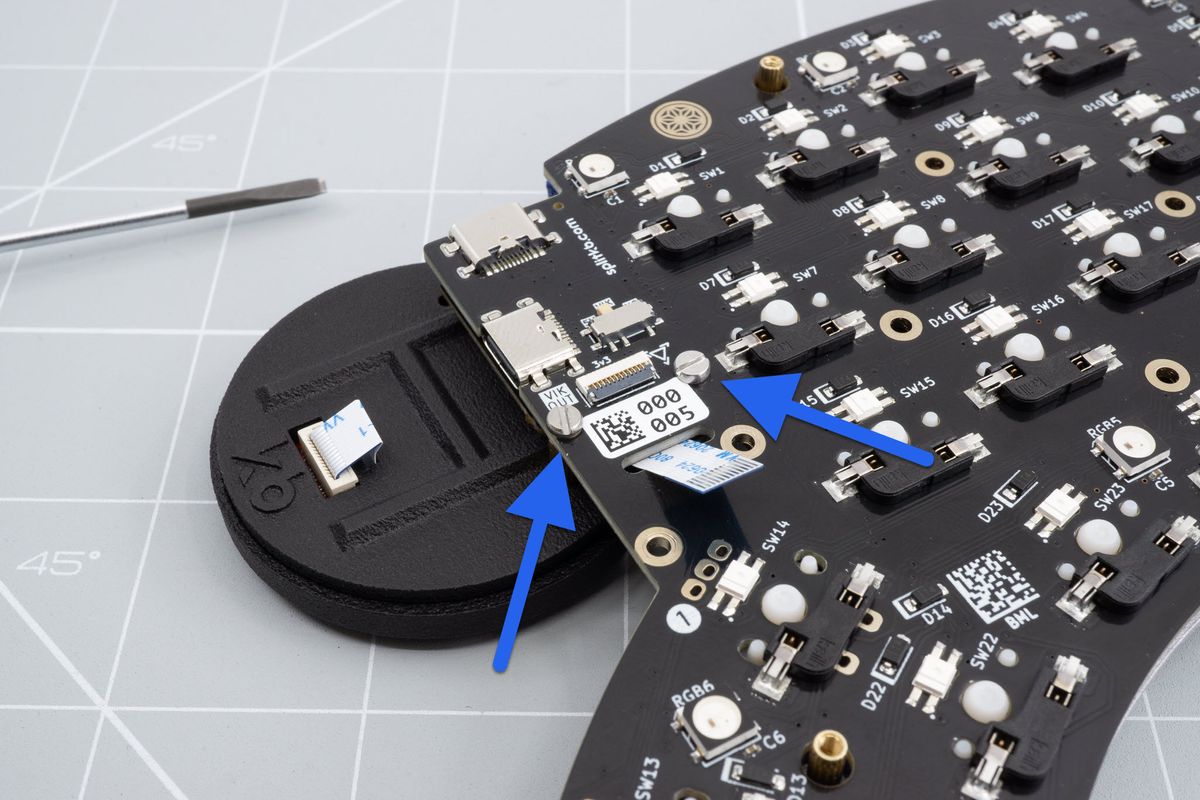
Screwing down the module.
Now lift the tab up from the VIK connector on the keyboard using the non conductive tool.
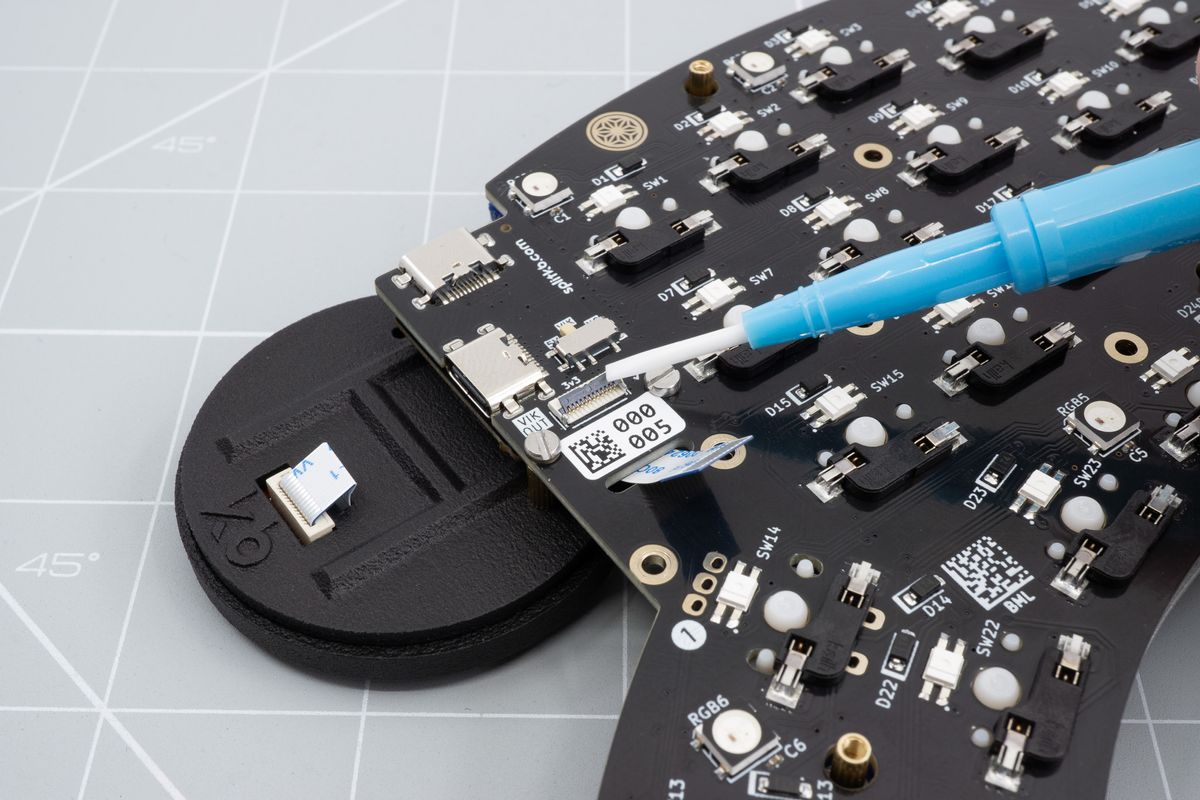
Lifting the tab up on the keyboard.
Now insert the cable. The easiest way is to push down on the cable with your finger and carefully push it in to the connector until you can't push it in any further.
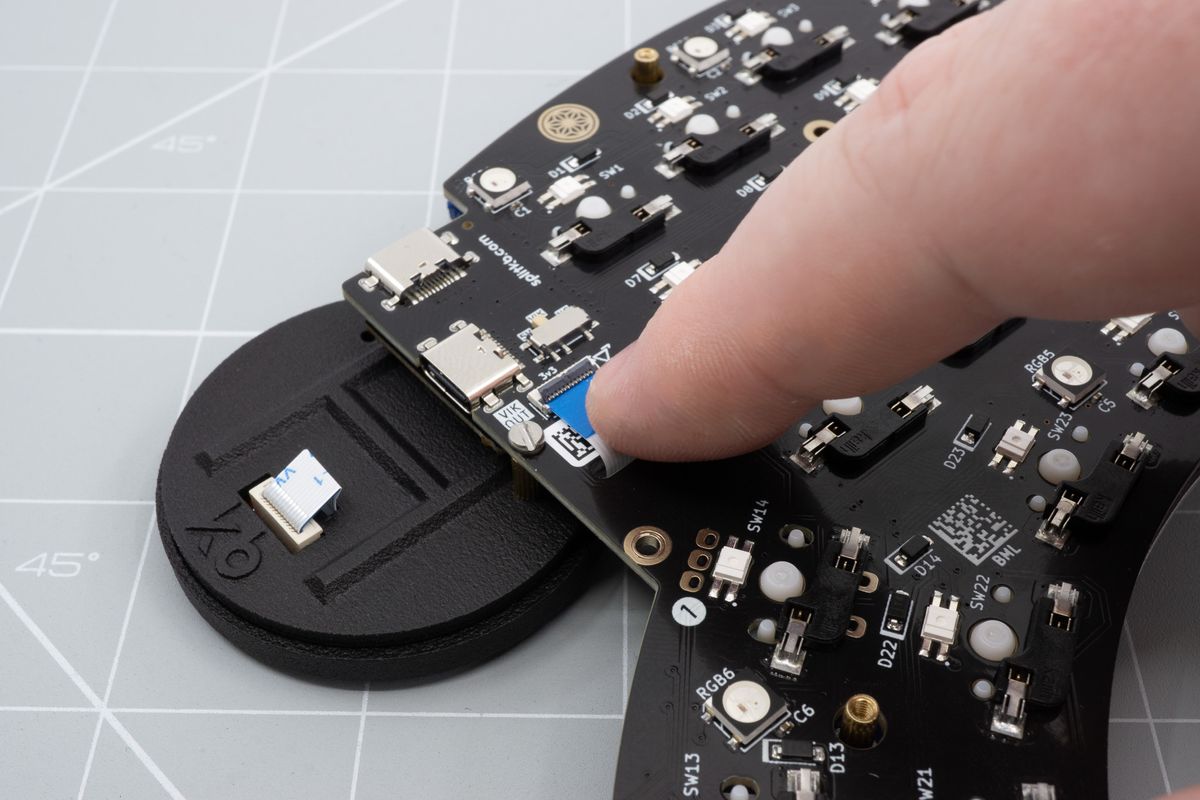
Pushing in the cable with your finger.
Lower the tab back down with the non conductive tool.
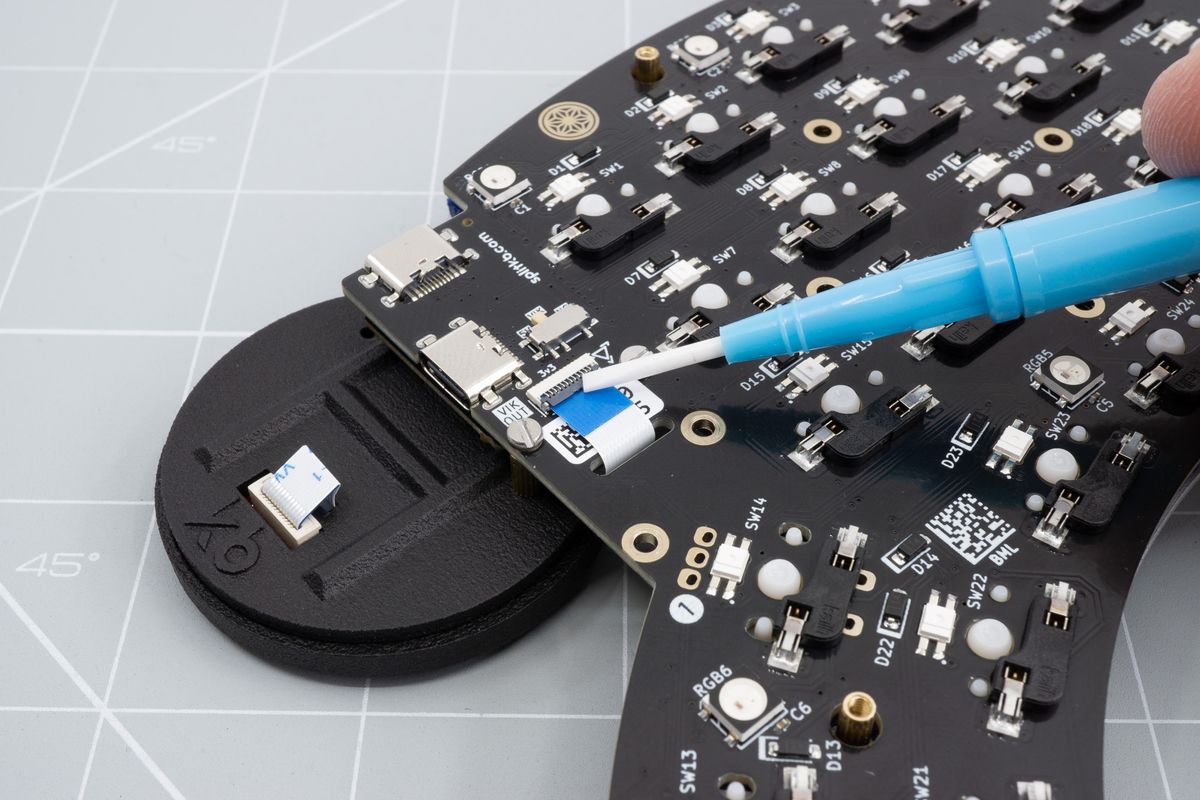
Lowering the tab back down.
You can now tighten the locking ring all the way by turning it clockwise. You've now successfully installed the encoder module! You can now continue with the build guide.
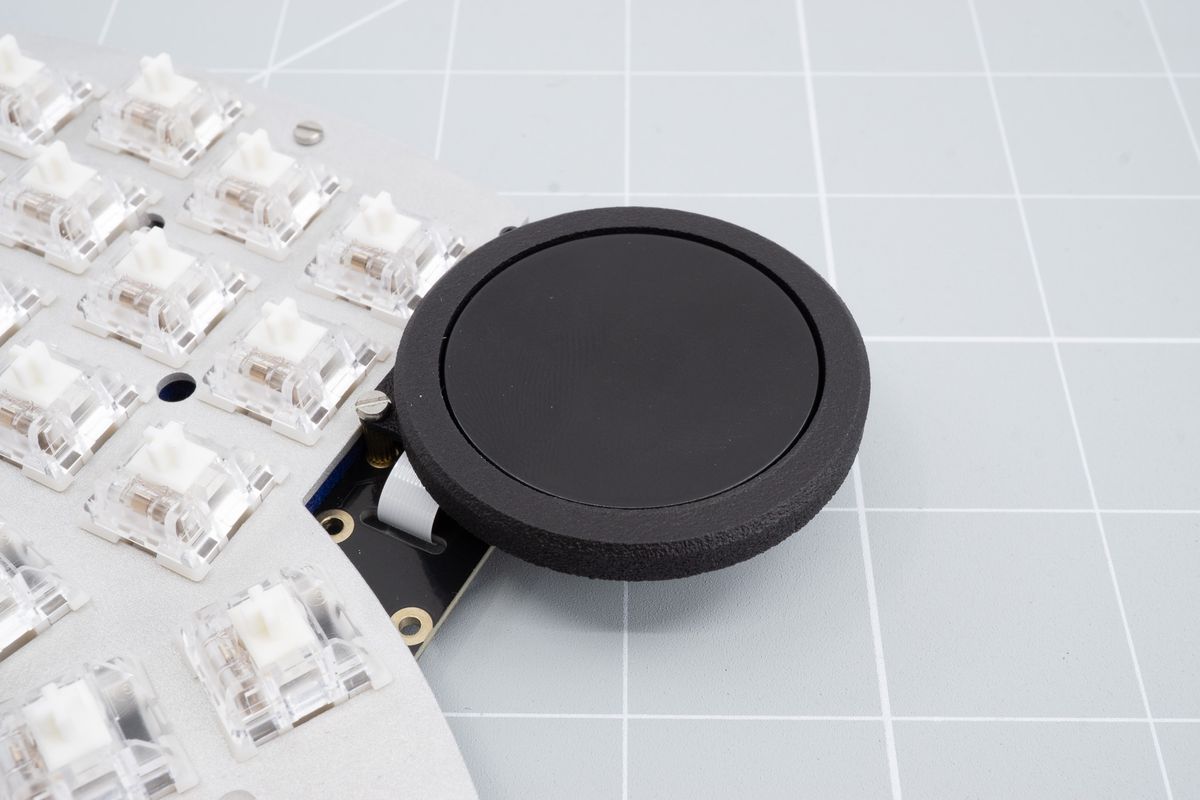
Installed module.
Using the module
Using the module is as easy as just plugging it in with the correct firmware installed on your keyboard.
When sliding your finger across the surface you will move the mouse cursor around. Touch originating in the outer ring of the trackpad can trigger scrolling by moving your finger along the edge.
Customizing the behavior
To customize the behavior you will have to compile your own firmware. For the cirque trackpad, look at the QMK documentation for the cirque trackpad to see what options are available.
Encoder module
How to install and use the Encoder module.
Replace or remove a module
How to replace or remove a module.

