About Split Keyboards - Build Guide
Identify features
Let's check out what is what on your Halcyon keyboard and controller.
The keyboard
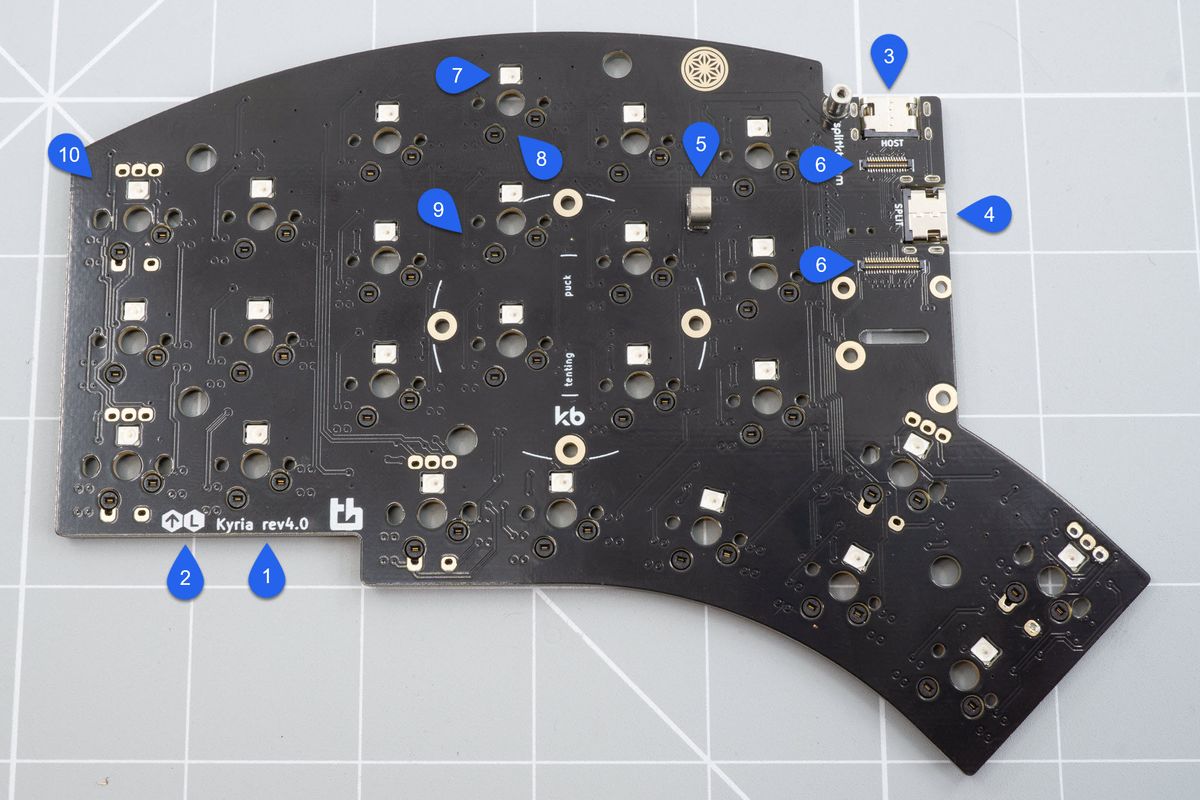
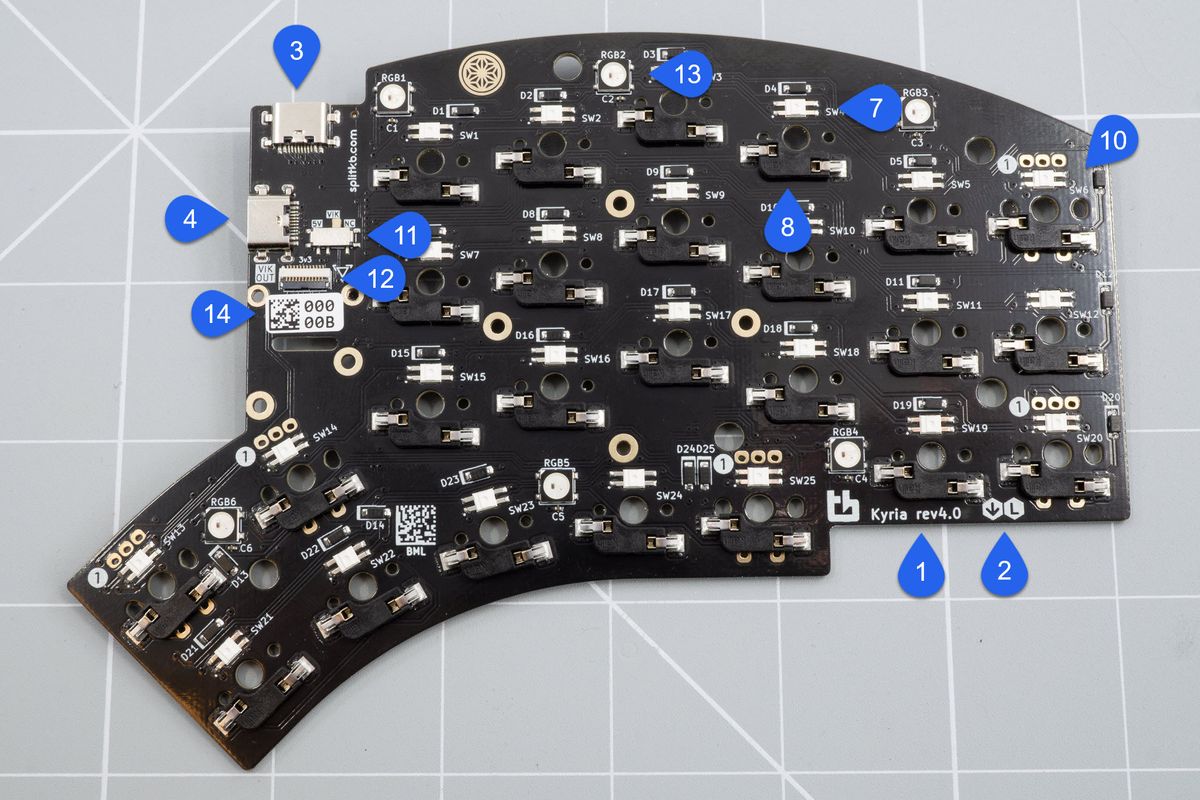
Info: While a Halcyon Kyria is pictured here, all of the features are also on any of our other Halcyon keyboards.

Front side of the keyboard..

Back side of the keyboard..
- Keyboard name and revision
This is the name of the keyboard and it's revision. This can be useful for seeking support with your specific keyboard. - Keyboard side indicators
This is where you can find out which side of the keyboard you're working with. The L and R define which side the keyboard half is. The up and down arrow define what the top and bottom of the keyboard half is respectively. - Host USB port
This is the USB C port where you connect it to the host side, such as a computer, laptop or phone. - Split interconnect USB port
This is where you connect to other half of your split keyboard to. - Conductive cushion
This is a conductive pad where a metal top plate can make contact with and help protect your keyboard against static electricity from your body. - Controller connector ports
This is where your controller connects with the main keyboard. On our Halcyon keyboards the controller will be pre-installed so you won't see this unless you remove the controller. This may change in the future. - Per-key RGB LEDs
These are the LEDs that light up all your switches and keycaps. - Switch hotswap socket
This is where your switches will click in to. - Tenting puck location
This is where you can install a tenting puck. - Solderable encoder footprint
This is the footprint where you can install an encoder to your keyboard. This is an advanced feature. - VIK voltage selector switch
This is where you can select the input voltage of the VIK connector. - VIK port
This is where any module will connect to the keyboard using a flat cable. - Underglow RGB LEDs
These are the LEDs which will glow on the underside of your keyboard. - Serial number sticker
This is the serial number of your keyboard. The serial codes are linked to a database where we can see the test results from the factory. This can be helpful for support purposes.
The controller

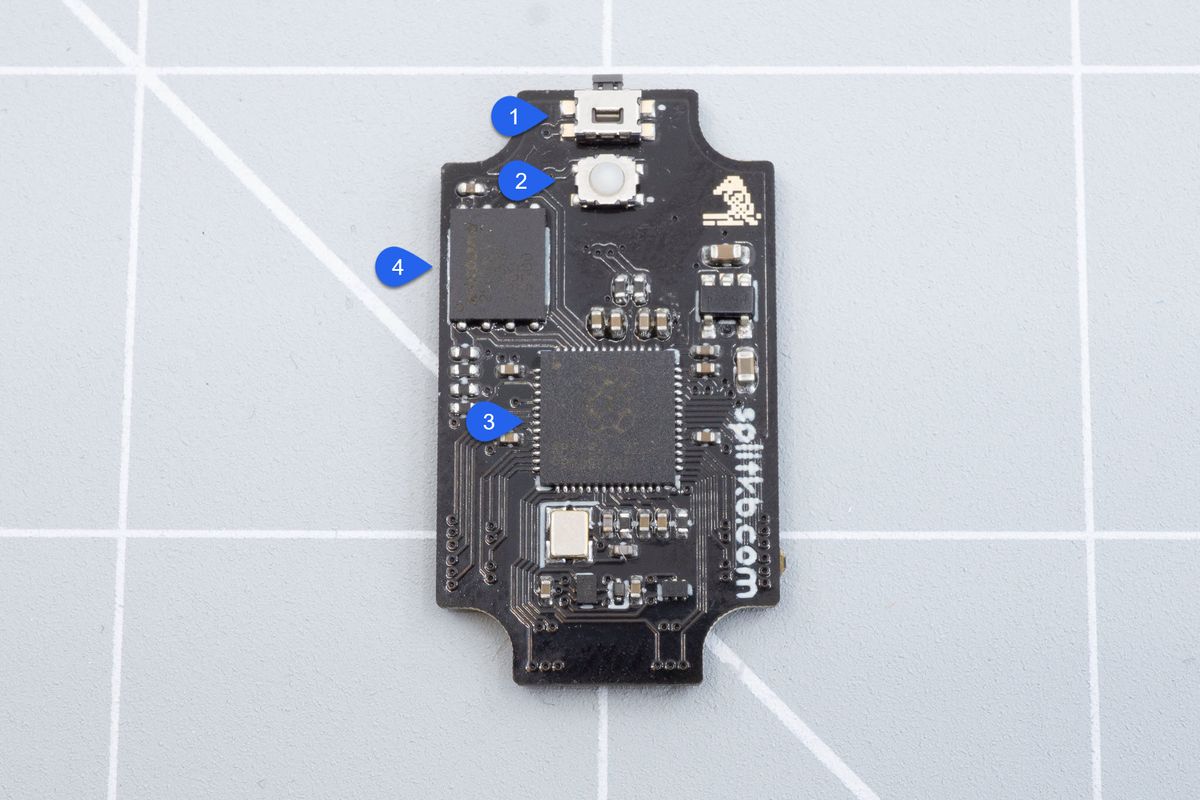
Front side of the wired controller..

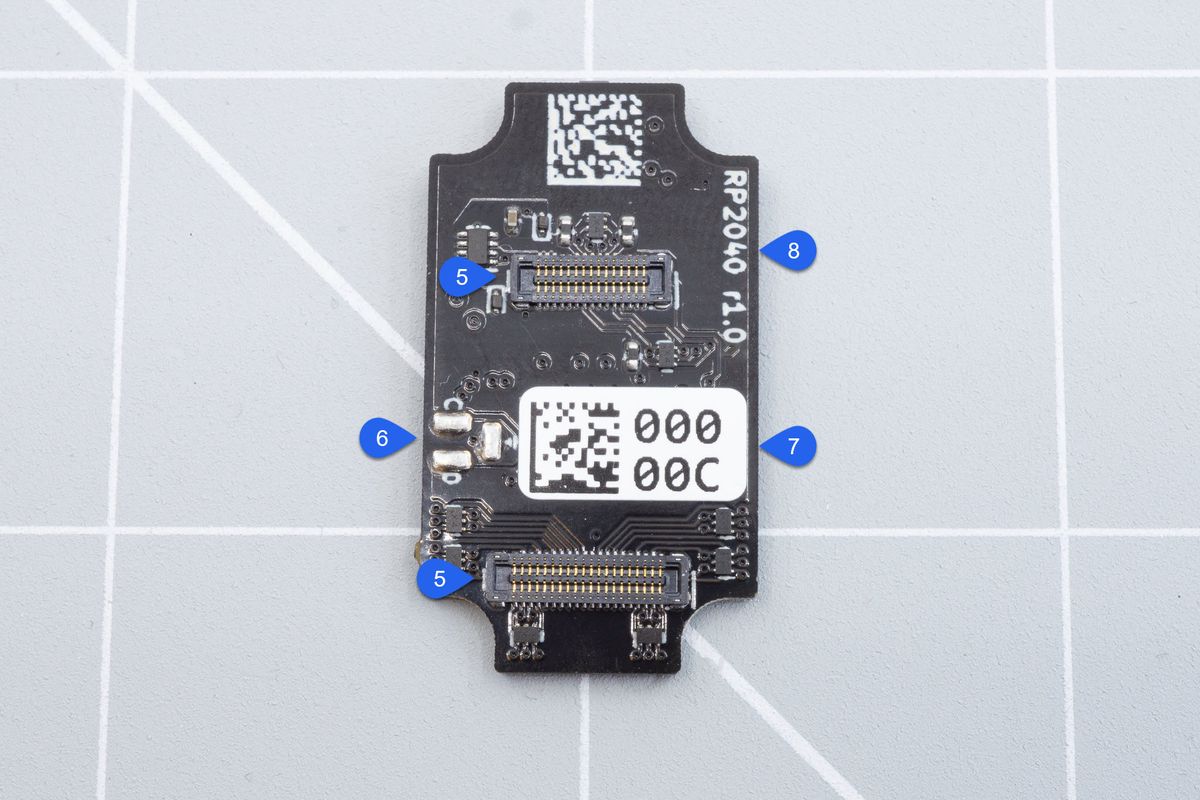
Back side of the wired controller..
- Reset button
You can use this button to reset the keyboard by pressing it once or enter the bootloader by double-tapping the button. - Boot button
Using this button you can directly enter the bootloader when you plug in your keyboard. Under the normal circumstances this button should not be needed. - RP2040 Microcontroller
This is the heart of the controller. - Flash chip
This is where the firmware and any options are stored. - Controller connector ports
This is where the controller plugs in to the keyboard. - Debugging pins
These pins can be used to debug the controller but you won't need these unless you're an advanced user. - Serial number sticker
This is the serial number of your controller. The serial codes are linked to a database where we can see the test results from the factory. This can be helpful for support purposes. You may notice that your controller doesn't have a serial number sticker because we test the controller and keyboard together. But this may change in the future. - Controller name and revision
This is the name of the controller and it's revision. This can be useful for seeking support with your specific controller.
Introduction
Welcome to the Halcyon Build Guide!
Controller
The first step to building your Halcyon keyboard.
Questions? Help us improve!
Do you have questions after reading the documentation? Do you have feedback about this page, or about the documentation in general? Please send us an email. You can use the buttons below which will open your mail client or app with a template, or send your mail to support@splitkb.com.

