Where to find firmware
Each keyboard half will have it's own firmware depending on what module you have installed.
You can find your firmware files using our Firmware Finder. We're currently in the process of upgrading it, the files can be found at the new version at https://splitkb.com/fw.
Flashing firmware
When you have downloaded the correct firmware for each half of the keyboard you can install it on to the keyboard.
Insert the keyboard in to the computer using a USB cable. On your computer you should see a new device pop up called RPI-RP2.
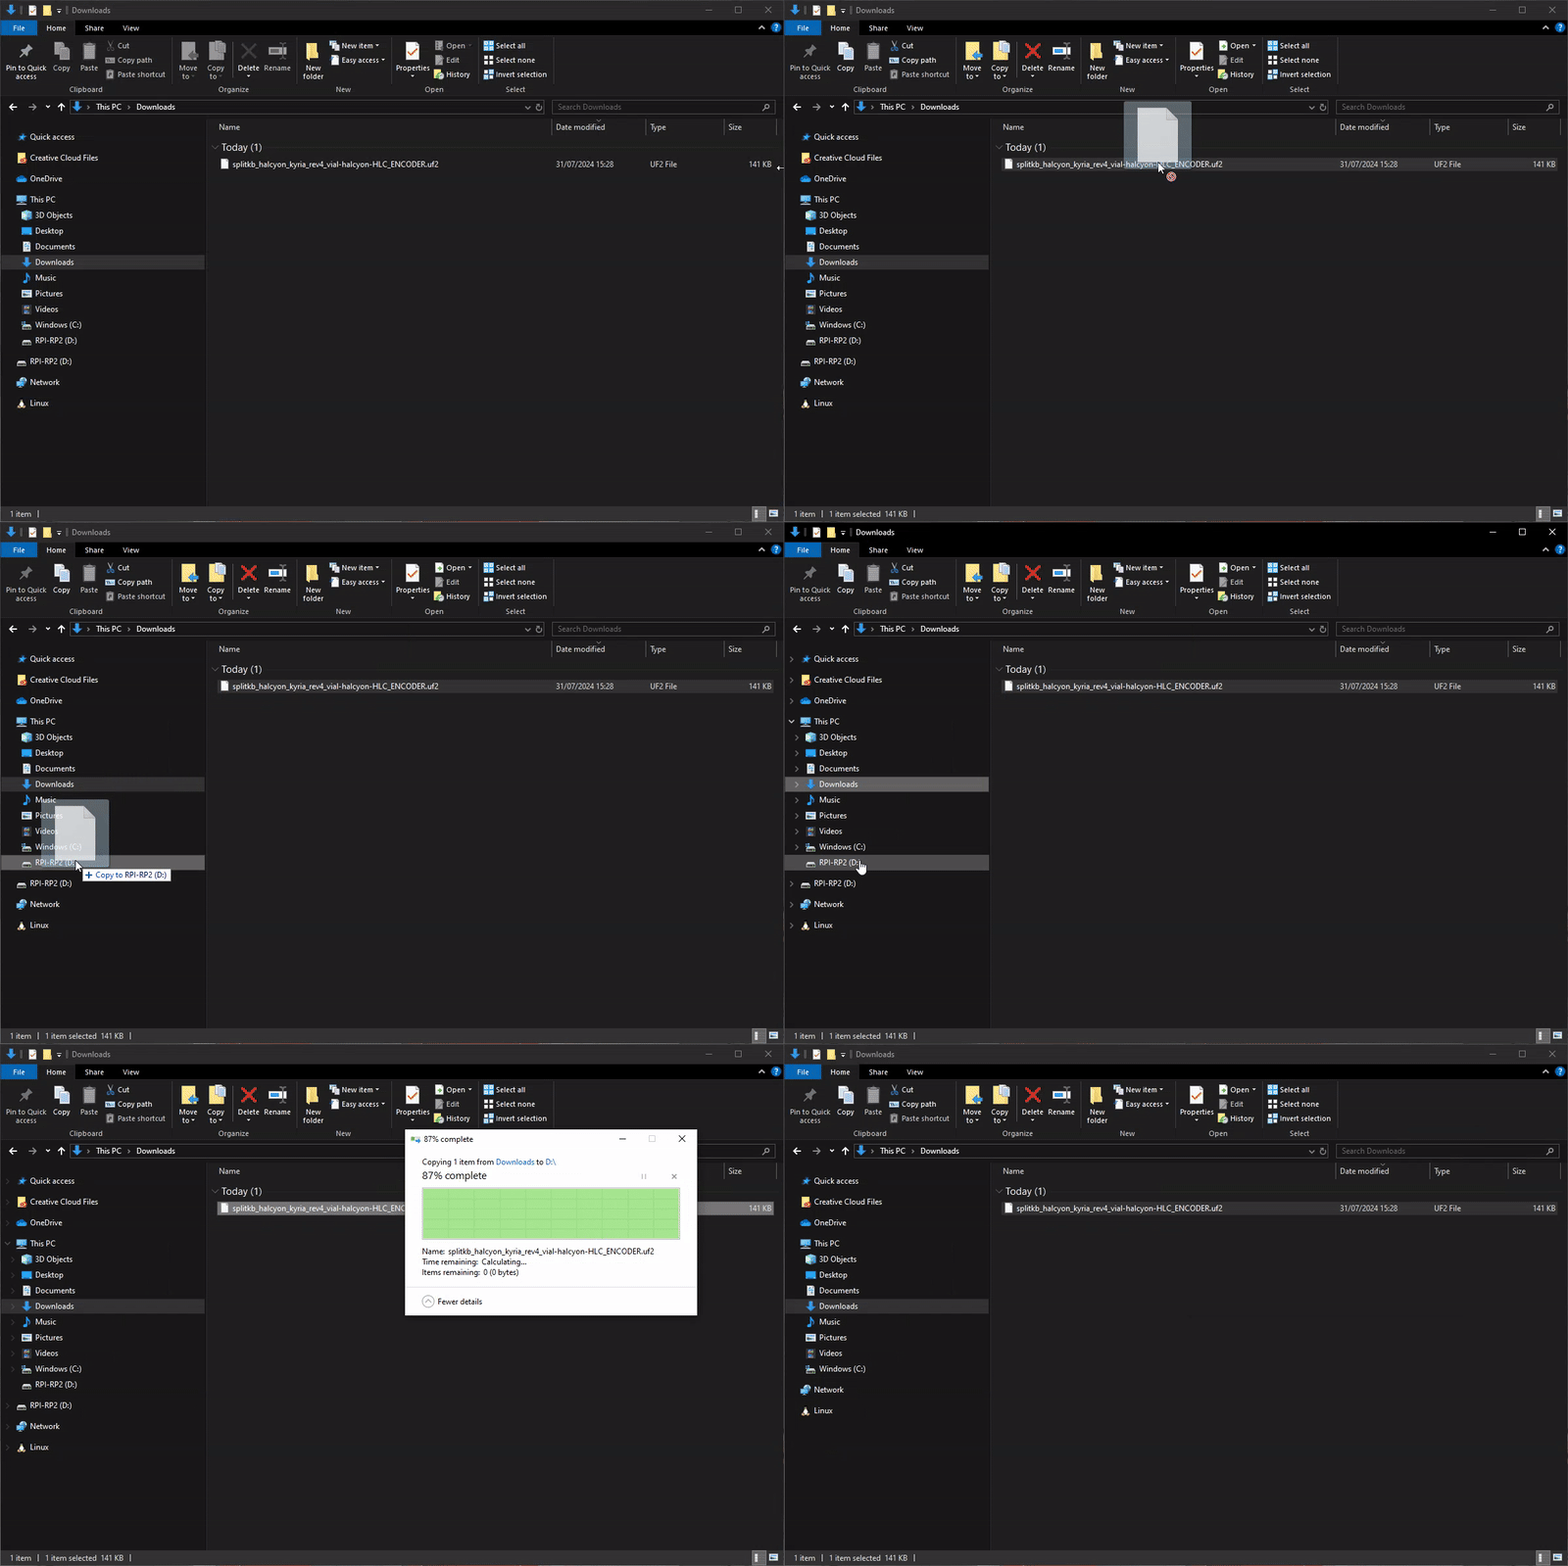
Drag and drop or copy and paste the firmware file in to the RPI-RP2 device.
If it is flashed successfully the device should get disconnected and after a couple of seconds the RGB will light up on the keyboard. The flashing process may take a couple of seconds depending on which firmware you're installing. The process should be similar on Windows, Linux and Mac.

Flashing the keyboard on Windows.
You will now have to unplug the keyboard and plug in the other half of the keyboard as both halves will need to be flashed individually. Repeat the steps above.
You have now successfully installed the firmware on to the keyboard! You can now continue with Using vial.
Go to the using vial pageChanging firmware
If you ever want to change the module you have installed or maybe update the keyboard to the latest firmware you will need to reinstall the firmware.
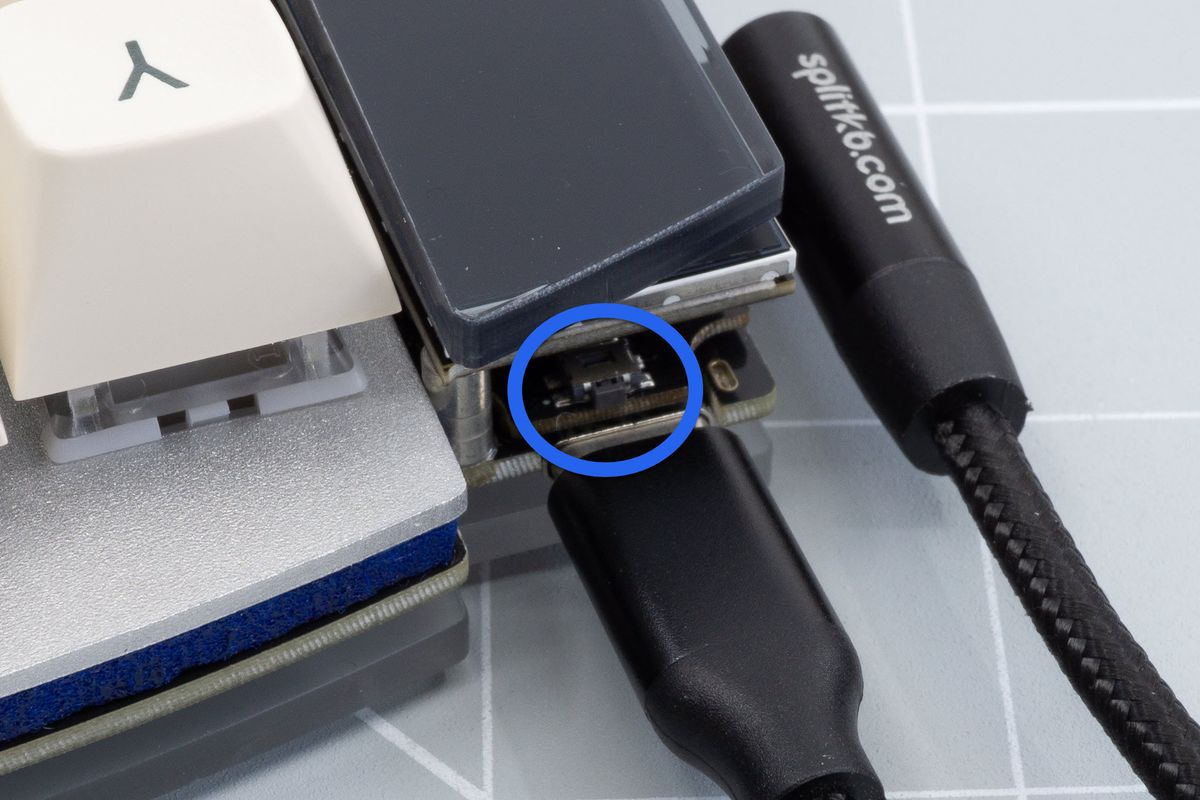
To change the firmware, you can double-tap the reset button at the top of your controller. This button is small and may be hard to press using your finger. You can also use a spudger, guitar pick, plastic screwdriver, your fingernail or something similar to press this button.

Position of the reset button on our wired controller.
This should make the RPI-RP2 device pop up again. You can then follow the steps above once more.
It's always wise to reinstall the firmware on both halves when changing firmware. This is because the firmware may be updated since you first started using the keyboard.
Troubleshooting
If your keyboard is unresponsive after double-tapping the reset button, yet won't present a disk, there's also an alternative way to enter the bootloader mode. To use it, you can hold the controller's boot button while plugging the cable into your keyboard.
The boot button is the top-facing button, located behind the reset button With no module installed press and hold the boot button and plug in the usb cable while still holding the boot button.
This should make the RPI-RP2 device pop up again. You can then follow the steps on installing the firmware again.

